Showing posts with label Sweet Punch. Show all posts

Sunday, 8 January 2012

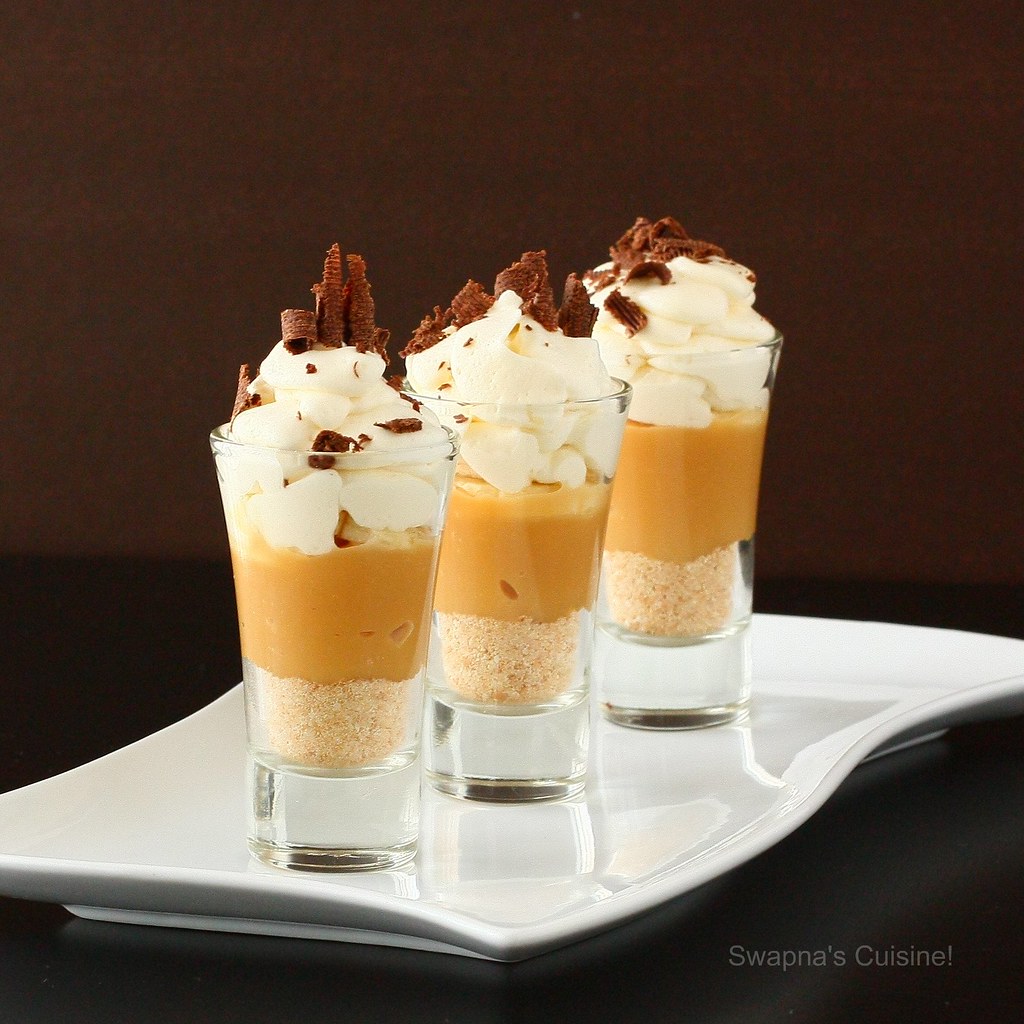
Banoffee Pie Served in a Glass


Read More » Print Friendly and PDF

Wednesday, 7 December 2011

Bakery-Style Cinnamon Bursts Recipe


Whenever I ask my son what would he like to have when he gets back from school, I always get an answer like cinnamon rolls or doughnuts! He loves cinnamon flavored buns/ rolls..... So I am always on the look-out for similar recipes..... When I saw these cute Cinnamon Bursts at Betty Crocker’s site I knew he would love them.... it’s tastes very similar to the Cinnamon Pull Apart Bread I posted earlier..... Kids will love this cute flowery shaped buns..... Ideal for a kid’s birthday party..... If you plan on trying these for a birthday party I would suggest making them in 24 muffin cups instead of 12 in the original recipe.....
I was not able to participate in the Sweet Punch challenge for the last couple of months. This month’s Sweet Punch challenge was to bake your choice and I selected this Bakery-Style Cinnamon Bursts as my entry :).... 
Read More » Print Friendly and PDF

Friday, 8 July 2011

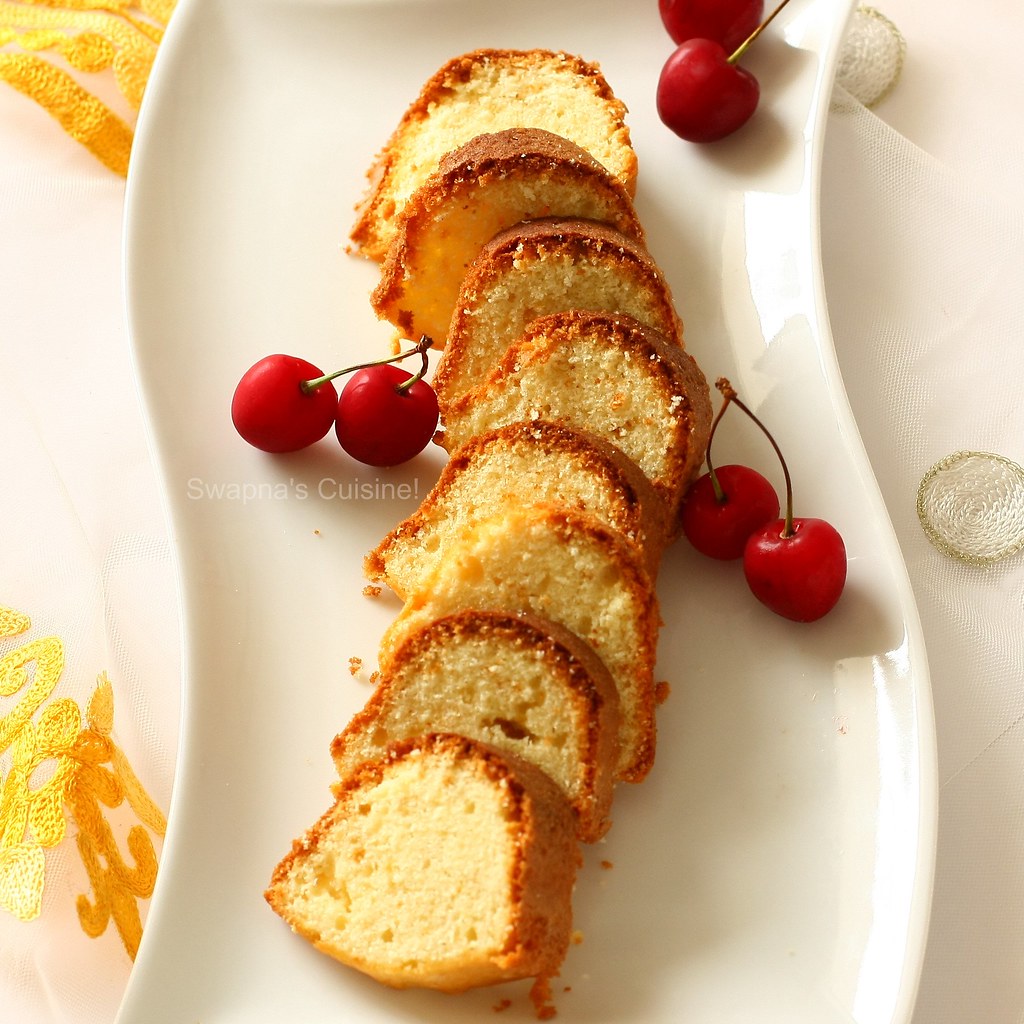
The Perfect Pound Cake


July Sweet Punch challenge is to make a Pound Cake. The recipe is from The Cake Bible, where Rose has come up with a new method of baking the cake, very different from the butter-sugar creaming and wet+dry ingredients, the usual cake route. This method, according to Rose ensures a tight crumb.
Read More » Print Friendly and PDF

Sunday, 8 May 2011

Cinnamon Sugar Pull-Apart Bread

Read More » Print Friendly and PDF

Sunday, 9 January 2011

Meringue Mushrooms


T his month’s Sweet Punch challenge theme was Meringue and we have 3 recipes to choose from.
  1. Meringue Cake ~ Joy of Baking
  2. Chocolate Meringue Cake ~ Martha Stewart
  3. Meringue Mushrooms ~ Joy of Baking
Since we have been having a lot of high calorie cakes and desserts during the last one month, I opted to make Meringue Mushrooms. I used to make Meringue Cookies, but had never made it in the shape of a mushroom… really enjoyed making these mushrooms, it looked very cute and my little one loved it:).... I did a little change in the recipe; instead of baking twice to glue mushroom cap and stem, I used melted chocolate to glue the mushroom caps and stem. Check out Nicole's For the Love of Food blog for an awesome video on how to make Meringue Mushrooms.


Meringue Mushrooms
(From Joy of Baking)


Ingredients:
2 large (30 grams) egg whites, room temperature
1/4 teaspoon cream of tartar
1/2 cup (100 grams) superfine (caster) white sugar (if you don't have superfine sugar simply take granulated white sugar and process it for about 30 seconds in a food processor).


Method:
  • Line two baking sheets with parchment paper. Have two pastry bags ready (one for piping the caps and stems and one for gluing them together). Fit one small pastry bag with a number 3 (1/16 inch diameter) (.2 cm) round plain tip (used to glue the stems and caps together) and one large pastry bag with a number 6 (1/2 inch diameter) (1 1/4 cm) round plain tip (for stems and caps). Fold down the tops of the bags to form a deep cuff on the outside and place each bag in a tall narrow glass for support. This will make it easy to transfer the meringue to the pastry bags.
  • Preheat oven to 200 degrees F (100 degrees C) and place 2 oven racks in the upper and lower thirds of the oven.
  • In bowl of electric mixer, at moderately slow speed, beat the room temperature egg whites until foamy. Add the cream of tartar and beat at medium speed until soft peaks form. Continue beating (increasing speed to high), gradually adding the superfine sugar, until the whites are very stiff and glossy. (You want to make sure that the sugar has dissolved completely - to test rub a little of the meringue between your fingers.)
  • With a rubber spatula place approximately 1/4 cup of the meringue in the pastry bag with the small tip (used to glue the caps and stems together). Place the remainder of the meringue in the large pastry bag.
  • To Pipe Caps: Holding the pastry bag upright and close to the parchment paper, pipe the meringue with even pressure, into even rounds building up the meringue to form a 2 inch (5 cm) round that is about 1 inch (2.5 cm) high. Sharply twist the bag and stop the pressure as you slowly move the tip off the meringue. Try to make the top as smooth as possible but use a wet fingertip to smooth out any bumps.
  • To Pipe Stems: Holding the pastry bag upright and close to the parchment paper, pipe the meringue with even pressure, into a cone-shape, making the base of the stem a little larger than the top. The stem should be about 1 inch (2.54 cm) high. Try to keep the stems as straight as possible. Some of the stems may fall over on their sides during baking, so it is a good idea to make extra.
  • Bake the meringues for approximately one hour, or until the mushrooms are firm enough that they can be lifted from the baking sheet without sticking. Rotate the baking sheets from top to bottom and front to back (about three quarters of the way through) to ensure even baking.
  • Remove from oven and with a small sharp knife, make a small hole in the middle of the underside of each mushroom cap. Using the small pastry bag fitted with the 1/l6 inch tip, pipe a little bit of meringue in the hole and gently press the top of the stem into the hole.
  • Place the mushrooms, caps down, on a parchment lined baking sheet and return to oven for about 15 - 30 minutes, or until the mushroom are dry. Remove from oven and lightly dust the tops of the mushrooms with cocoa powder. Use a small pastry or paint brush to smudge the cocoa powder, if desired.
  • Store in an airtight container for several weeks.
  • Makes about 24 - 30 mushrooms (depending on size)

M y previous post Peach & Mango Cheese Cake was selected as one of Foodbuzz’s Top 9 on Jan 8. This is the second post of mine that has been selected by Foodbuzz and I am really happy. Thank you so much for all those who visited my blog and took time to leave a comment… I am over whelmed :)


Read More » Print Friendly and PDF

Saturday, 13 November 2010

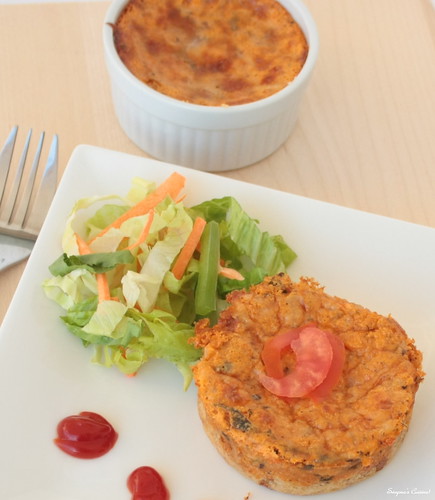
Tomato Soufflé


Sweet Punch’s November challenge was hosted by Ria and this time she choose the topic Mousse and Soufflé… she gave 3 recipes to choose from:
1- Tomato Soufflé
2- Eggless Instant Chocolate Mousse (this I made a couple of months back and have already posted it here).
3- Chocolate Mousse (with eggs)
I wanted to try this soufflé after I saw the recipe at Maria’s place… somehow I couldn’t meet the posting date but I didn’t want to miss this challenge … so I made it today and we loved it…better late than never right? ;) … So here I am with Tomato Soufflé….


Tomato Soufflé
(Recipe source : Australian Woman's Weekely via Maria's Menu)
Ingredients:
Fresh Bread crumbs – 1/2 cup, firmly packed
Butter – 45 gm (I only used 1 tbsp)
Onion – 1 medium, finely chopped
Plain flour (maida) – 2 tbsp
Milk – 1 cup
Tomato paste – 3 tbsp (I used 1 medium tomato pureed)
Basil – 1 tbsp, finely chopped (I didn't have fresh basil, so I added 1tsp dry basil)
Eggs – 3, separated (I used 2 eggs & white of 3 eggs)
Grated Cheese – a handful ( I used mozzarella)
Extra hot chilly sauce-1tsp
Corriander Leaves-1 tbsp
Pepper powder- 1 tsp
Sugar-1/2 tsp


Method:
  • Grease 4 souffle dishes (1/2 cup capacity), sprinkle with breadcrumbs.
  • Melt butter in small saucepan, add finely chopped onion. Stir over low heat for 2 mins ( or MW on HIGH for about 2 mins).
  • Cook until onion is soft, it doesn’t have to become brown.
  • Stir in flour and stir over medium heat for a minute. (or MW on HIGH for a min).
  • Remove from heat, gradually stir in milk, bring back to heat and stir over high heat until mixture boils & thickens & reaches a thick sauce like consistency. (or MW on HIGH for about 3 mins).
  • Transfer to large bowl, stir in tomato paste & basil leaves, corriander leaves, pepper powder, hot cholly sauce and sugar.
  • Cover the dish & let it stand for 5 mins.
  • Beat egg whites in a small bowl until soft peaks from.
  • Add egg yolks to the onion & milk mixture & mix well.
  • Fold the egg whites into the mixture in 2 batches.
  • Pour the mixture evenly into the prepared dishes.
  • Sprinkle the grated cheese on top.
  • Bake in the preheated oven for 20- 25 mins or until lightly browned.
  • Serves 4.


Refer Maria's Menu for the original recipe.

Healthier version: use brown bread crumbs & low fat milk. Also use yolks of only 2 eggs & white of 3 eggs. Use only lesser qty of butter,

Notes: The above qty serves 2 adults served with garlic bread or soup and Salad. You can use any oven safe dish to prepare this. The original recipe calls for no spices, but you can add crushed pepper while cooking onion, if you wish.
Substitute for tomato paste: http://chowhound.chow.com/topics/312148


Read More » Print Friendly and PDF

Thursday, 7 October 2010

Molten Lava Cake


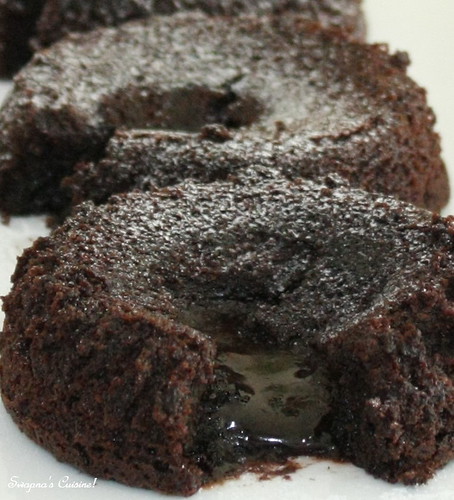
October Sweet Punch was hosted by Divya and she selected Molten Lava Cake this time. This highly rich chocolate cake is easy to prepare but we need to be careful on baking time. If you cook one or more minutes longer than required, you won’t get the gooey centre. I halved the recipe and got only 3 ramekins small Molten Lava Cake for three of us to enjoy this Oooey, gooey chocolaty goodness. Since I used dark cooking chocolate, cake colour is on the darker side and less sugary.


Molten Lava Cake
(Recipe source - showmethecurry.com)

Ingredients:
Semi-Sweet Baking Chocolate – 4 oz (113g)
Butter – 4 oz (113g)
Eggs – 2
Sugar – 1/3 cup (75 g)
All-purpose Flour – 1/4 cup (40g)
Butter – for greasing ramekins

Method:
  • In a double boiler, melt chocolate.
  • In a medium mixing bowl, beat Eggs and Sugar until light and fluffy.
  • Once chocolate is melted, remove pan from heat and add in butter. Mix until the butter melts fully.
  • Add chocolate/butter mixture into the eggs, add all-purpose flour and mix until well incorporated.
  • Butter bottom and sides of ramekins (small glass/porcelain bowls) and pour in mixture about 3/4 way full.
  • Place ramekins on a baking tray and bake at 350 degrees Fahrenheit (180 C) for 10 – 15 minutes. Shorter for gooey (molten) inside, longer for stiff inside. (I baked for 10 minutes).
  • Serve hot with vanilla ice cream or Whipped cream.

P.S - Some people find it gross to have cakes with uncooked centers and feel the lava is nothing but uncooked batter. If you feel so, just place a chocolate chunk in between--pour half the batter into the ramekin and place a chocolate chunk,and pour the remaining batter and cook for a longer time than mentioned.You could also place cold ganache in between,choices are numerous!!


Molten Chocolate Cake


Read More » Print Friendly and PDF

Tuesday, 7 September 2010

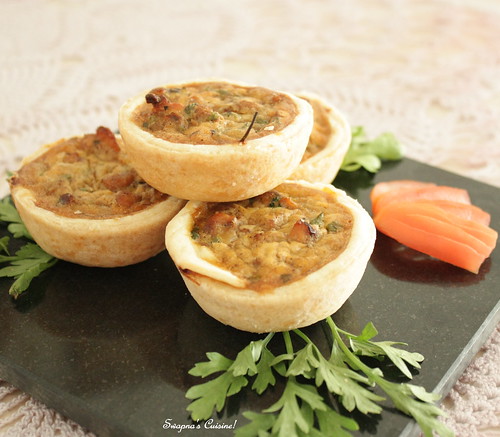
Golden Onion Chicken Quiche!


Sweet Punch challenge for September was hosted by Ria and this time she selected a savory bake for us. The challenge was to make a Quiche. Instead of making one big Quiche in an 8 inch pan, I used my muffin tin to make Mini quiche. I didn’t add egg in the pastry dough and also reduced the amount of butter to 75gms. I also reduced the amount of milk-cheese- egg mixture as per Nag’s suggestion. Thank you Ria for selecting this recipe!


Golden Onion Quiche
Serves 4

Ingredients:

For the pastry:
Maida -200g
Unsalted Butter (frozen) -100g (I only used 75g)
Baking powder-1/4 tsp
Salt-to taste
Beaten egg-1 (I didn’t add egg)
Ice cold water-as required (which will be a few drops)

Method:
  • Sieve maida, salt and baking powder together.
  • Grate in the butter and mix it with the flour with your fingertips till it resembles coarse sand.
  • Add in the beaten egg and water and gather it into a soft dough.
  • Roll it out on a lightly floured surface and lift it up carefully and line the tin that you will be baking it in. If it breaks up and you need to do a patch work, big deal! It wouldn't be seen outside! ;)
  • Whichever tin you are using, make sure the dough comes a little way up the sides, so that it can hold the filling in.

Filling:

Ingredients:
Boiled and shredded chicken-1/2 c (you can substitute it for paneer or other veggies of your choice)
Onion-250 g, chopped
Milk-1 c (I only added ½ cup)
Cheese-100g (cheddar will work fine) (I only added 75gms)
Beaten eggs-3 (I used only 1 egg)
Salt and pepper to taste
Oil- as needed.

Method:
  • Heat oil and slightly fry the chicken/paneer til it is golden brown.
  • Add in the onions and fry till onions have caramelized.
  • Switch off the flame.
  • Add milk, cheese, beaten eggs, salt and pepper and mix well.
  • Pour into the pastry case and bake for 25 mins or till golden brown.
  • Let it cool in the tin completely.
  • Serve it in wedges.


Read More » Print Friendly and PDF

Wednesday, 7 July 2010

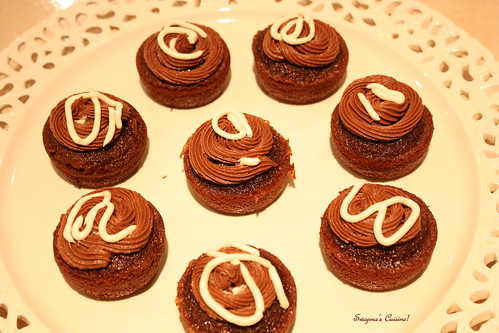
Sweet Punch ~ Devil's Food Cupcakes with Vanilla Cream filling


Sweet Punch challenge for July was hosted by Divya of Easy Cooking and she selected Devil's Food Cupcakes with Vanilla Cream filling from Baking Bites. The recipe consists of three components: making the cupcakes, the filling and the frosting. All three components require lot of butter and it is a very rich cake. I halved the recipe and I regretted it later as my little one really liked it. I enjoyed the challenge and we all appreciated the cake.


Devil's Food Cupcakes with Vanilla Cream filling
Recipe source - Baking Bites

Ingredients
1/2 cup butter, room temperature
2 cups sugar
3 large eggs
3/4 cup sour cream (low fat or full) -can be substituted with yogurt or cream mixed with a tsp of yogurt
1 tsp vanilla extract
2 cups all purpose flour
2 tsp baking soda
1/2 tsp salt
1/4 cup cocoa powder
2-oz dark chocolate
1 cup water, boiling

Method:
  • Preheat the oven to 350F and lightly grease two 12-cup muffin tins.
  • In a large bowl, cream together butter and sugar until light.
  • Beat in eggs one at a time, followed by sour cream and vanilla extract.
  • In a small bowl, whisk together flour, baking soda and salt.
  • Add half of flour mixture to the butter mixture, followed by the sour cream and vanilla extract, followed by the addition of the rest of the flour mix.
  • Stir well between each addition and mix until no streaks of flour remain.
  • Stir the cocoa powder and the dark chocolate into the boiling water (easiest in a large measuring cup).
  • Pour chocolate water into the rest of the batter and stir until uniform.
  • Evenly distribute batter into prepared baking cups.
  • Bake for 13-15 minutes, until a tester comes out clean and the cakes spring back when lightly pressed. (It’s fine if you can’t fit both trays into the oven at the same time, just wait until one batch finishes before putting in the second pan)
  • Turn cupcakes out onto a wire rack to cool completely before frosting and filling.


Vanilla Cream Filling
Ingredients:
3 tbsp all purpose flour
1/2 cup milk (low fat is fine)
1/2 cup butter (or trans fat-free shortening)
1/2 cup granulated sugar
1/2 scraped vanilla bean or 1 tsp vanilla extract

Method:
  • Whisk together the flour and milk and cook in a small saucepan over medium heat until thick. This will only take a few minutes.
  • Stir continuously to prevent the mixture from clumping and do not bring all the way to a boil.
  • When thickened (consistency will be that of a thin pudding or custard), strain with a mesh strainer into a small bowl, cover with plastic wrap and let cool completely to room temperature.
  • When the milk mixture is cool, cream the butter (or shortening) and sugar together in a medium bowl until lightl.
  • Add in the milk/flour mixture and the scraped vanilla bean seeds (or vanilla extract) and beat at high speed with an electrick mixer for 7 minutes, until light and fluffy.
  • Scrape into a pastry bag fitted with a plain tip, or a large ziplock bag with the corner cut off, and set aside until ready to fill your cupcakes.


Chocolate Buttercream Frosting

Ingredients:
1/2 cup butter, room temperature
1/2 cup unsweetened cocoa powder
2-3 cups powdered sugar
1/4 cup milk
1 tsp vanilla extract

Method:
  • Combine all ingredients in a large bowl and beat, with an electric mixer, until frosting is creamy, 3-5 minutes.
  • Add additional powdered sugar as needed to achieve a thick, but not stiff, frosting that is easy to spread.
  • Add additional milk, if necessary, to thin the frosting if it gets too thick.
Assembly (A photo how-to of the assembly method can be found here,,,
  • Take a cooled cupcake and, using a small pairing knife, cut a cone of cake (1-inch across by 1-inch deep) out of the top. Trim off the pointy end of the cone, leaving a flat circle of cake. Set aside and repeat this process for all the cupcakes.Take the cream filling and squeeze a tablespoon or so into each cupcake cavity, filling the hole up to the top with filling. Top off with a flat circle of cake to plug the hole and keep the filling in place.
  • Using a butter knife or a small offset spatula, frost each cupcake with a layer of chocolate buttercream frosting. Place a dollop of icing in the center of the cupcake (on top of the cut out circle of cake) and spread from the center to the sides of the cupcake.If you have leftover filling, transfer it to a fresh ziploc bag and cut a very small opening in one corner. Pipe a swirly line down the center of each cupcake.Store in an airtight container until ready to serve.
  • Makes 2-dozen.


Read More » Print Friendly and PDF

Monday, 7 June 2010

Tiramisu Cake ~ First Sweet Punch Challenge!


The first Sweet Punch challenge was hosted by Ria and she selected Dorie Greenspan’s Tiramisu Cake. I recently made my first Tiramisu with homemade Mascarpone cheese, but Tiramisu Cake was something I had never tried before. I really enjoyed making this cake as much as my DH and son enjoyed eating it.


Verdict:
  • I felt the quantities given for soaking the syrup was not enough. Even after I had used up the entire syrup, the cake was still a little dry. We prefer the Tiramisu cake to be a little more moist…so next time I will definitely make more syrup to soak the cake.
  • I used chocolate chips instead of finely chopped chocolates…but I didn’t enjoy the chocolate bites in-between my cake and filling. So next time I will go for chopped/grated chocolate.
  • I also added 1 1/2 tsp of Orange Sugar to the cake batter and I really liked that orange flavour in my cake.


Tiramisu Cake
Baking: From My Home to Yours by Dorie Greenspan

For the cake layers:
2 cups cake flour
2 teaspoons baking powder
1/8 teaspoon baking soda
1/4 teaspoon salt
1 1/4 sticks (10 tablespoons) unsalted butter, room temperature
1 cup sugar
3 large eggs
1 large egg yolk
1 1/2 teaspoons pure vanilla extract
3/4 cup buttermilk
1 1/2 tsp Orange Sugar (optional)

For the espresso extract:
2 tablespoons instant espresso powder
2 tablespoons boiling water

For the espresso syrup:
1/2 cup water
1/3 cup sugar
1 tablespoon amaretto, Kahlua, or brandy

For the filling and frosting:
1 8-ounce container mascarpone (store-bought or homemade)
1/2 cup confectioners’ sugar, sifted
1 1/2 teaspoons pure vanilla extract
1 tablespoon amaretto, Kahlua, or brandy
1 cup cold heavy cream
2 1/2 ounces bittersweet or semisweet chocolate, finely chopped, or about 1/2 cup store-bought mini chocolate chips
Chocolate-covered espresso beans, for decoration (optional)
Cocoa powder, for dusting


Getting ready:

  • Center a rack in the oven and preheat the oven to 350 degrees F.
  • Butter two 9×2 inch round cake pans, dust the insides with flour, tap out the excess, and line the bottoms of the pans with parchment or wax paper. Put the pans on a baking sheet.

    To make the cake:
  • Sift together the cake flour, baking powder, baking soda, and salt.
  • Working with a stand mixer, preferably fitted with a paddle attachment, or with a hand mixer in a large bowl, beat the butter on medium speed until soft and creamy.
  • Add the sugar and beat for another 3 minutes.
  • Add the eggs one by one, and then the yolk, beating for 1 minute after each addition. Beat in the vanilla; don’t be concerned if the mixture looks curdled.
  • Reduce the mixer speed to low and add the dry ingredients alternately with the buttermilk, adding the dry ingredients in 3 additions and the milk in 2 (begin and end with the dry ingredients); scrape down the sides of the bowl as needed and mix only until the ingredients disappear into the batter.
  • Divide the batter evenly between the two pans and smooth the tops with a rubber spatula.
  • Bake for 28 to 30 minutes, rotating the pans at the midway point.
  • When fully baked, the cakes will be golden and springy to the touch and a thin knife inserted into the centers will come out clean.
  • Transfer the cakes to a rack and cool for about 5 minutes, then run a knife around the sides of the cakes, unmold them, and peel off the paper liners.
  • Invert and cool to room temperature right-side up.


To make the extract:

  • Stir the espresso powder and boiling water together in a small cup until blended. Set aside.

To make the syrup:

  • Stir the water and sugar together in a small saucepan and bring just to a boil. Pour the syrup into a small heatproof bowl and stir in 1 tablespoon of the espresso extract and the liqueur or brandy; set aside.

To make the filling and frosting:

  • Put the mascarpone, sugar, vanilla, and liqueur in a large bowl and whisk just until blended and smooth.
  • Working with the stand mixer with the whisk attachment or with a hand mixer, whip the heavy cream until it holds firm peaks. Switch to a rubber spatula and stir about one quarter of the whipped cream into the mascarpone.
  • Fold in the rest of the whipped cream with a light touch.

To assemble the cake:

  • If the tops of the cake layers have crowned, use a long serrated knife and a gentle sawing motion to even them.
  • Place one layer right-side up on a cardboard round or a cake plate protected with strips of wax or parchment paper. \Using a pastry brush or a small spoon, soak the layer with about one third of the espresso syrup.
  • Smooth some of the mascarpone cream over the layer – use about 1 1/4 cups – and gently press the chopped chocolate into the filling.
  • Put the second cake layer on the counter and soak the top of it with half the remaining espresso syrup, then turn the layer over and position it, soaked side down, over the filling.
  • Soak the top of the cake with the remaining syrup.
  • For the frosting, whisk 1 to 1 1/2 tablespoons of the remaining espresso extract into the remaining mascarpone filling. Taste the frosting as you go to decide how much extract you want to add. If the frosting looks as if it might be a little too soft to spread over the cake, press a piece of plastic wrap against its surface and refrigerate it for 15 minutes or so. Refrigerate the cake too.
  • With a long metal icing spatula, smooth the frosting around the sides of the cake and over the top. If you want to decorate the cake with chocolate-covered espresso beans, press them into the filling, making concentric circles of beans or just putting some beans in the center of the cake.

  • Refrigerate the cake for at least 3 hours (or for up to 1 day) before serving – the elements need time to meld.
  • Just before serving, dust the top of the cake with cocoa.

Read More » Print Friendly and PDF
Related Posts Plugin for WordPress, Blogger...