Wednesday 29 December 2021

Thumbprint Cookies


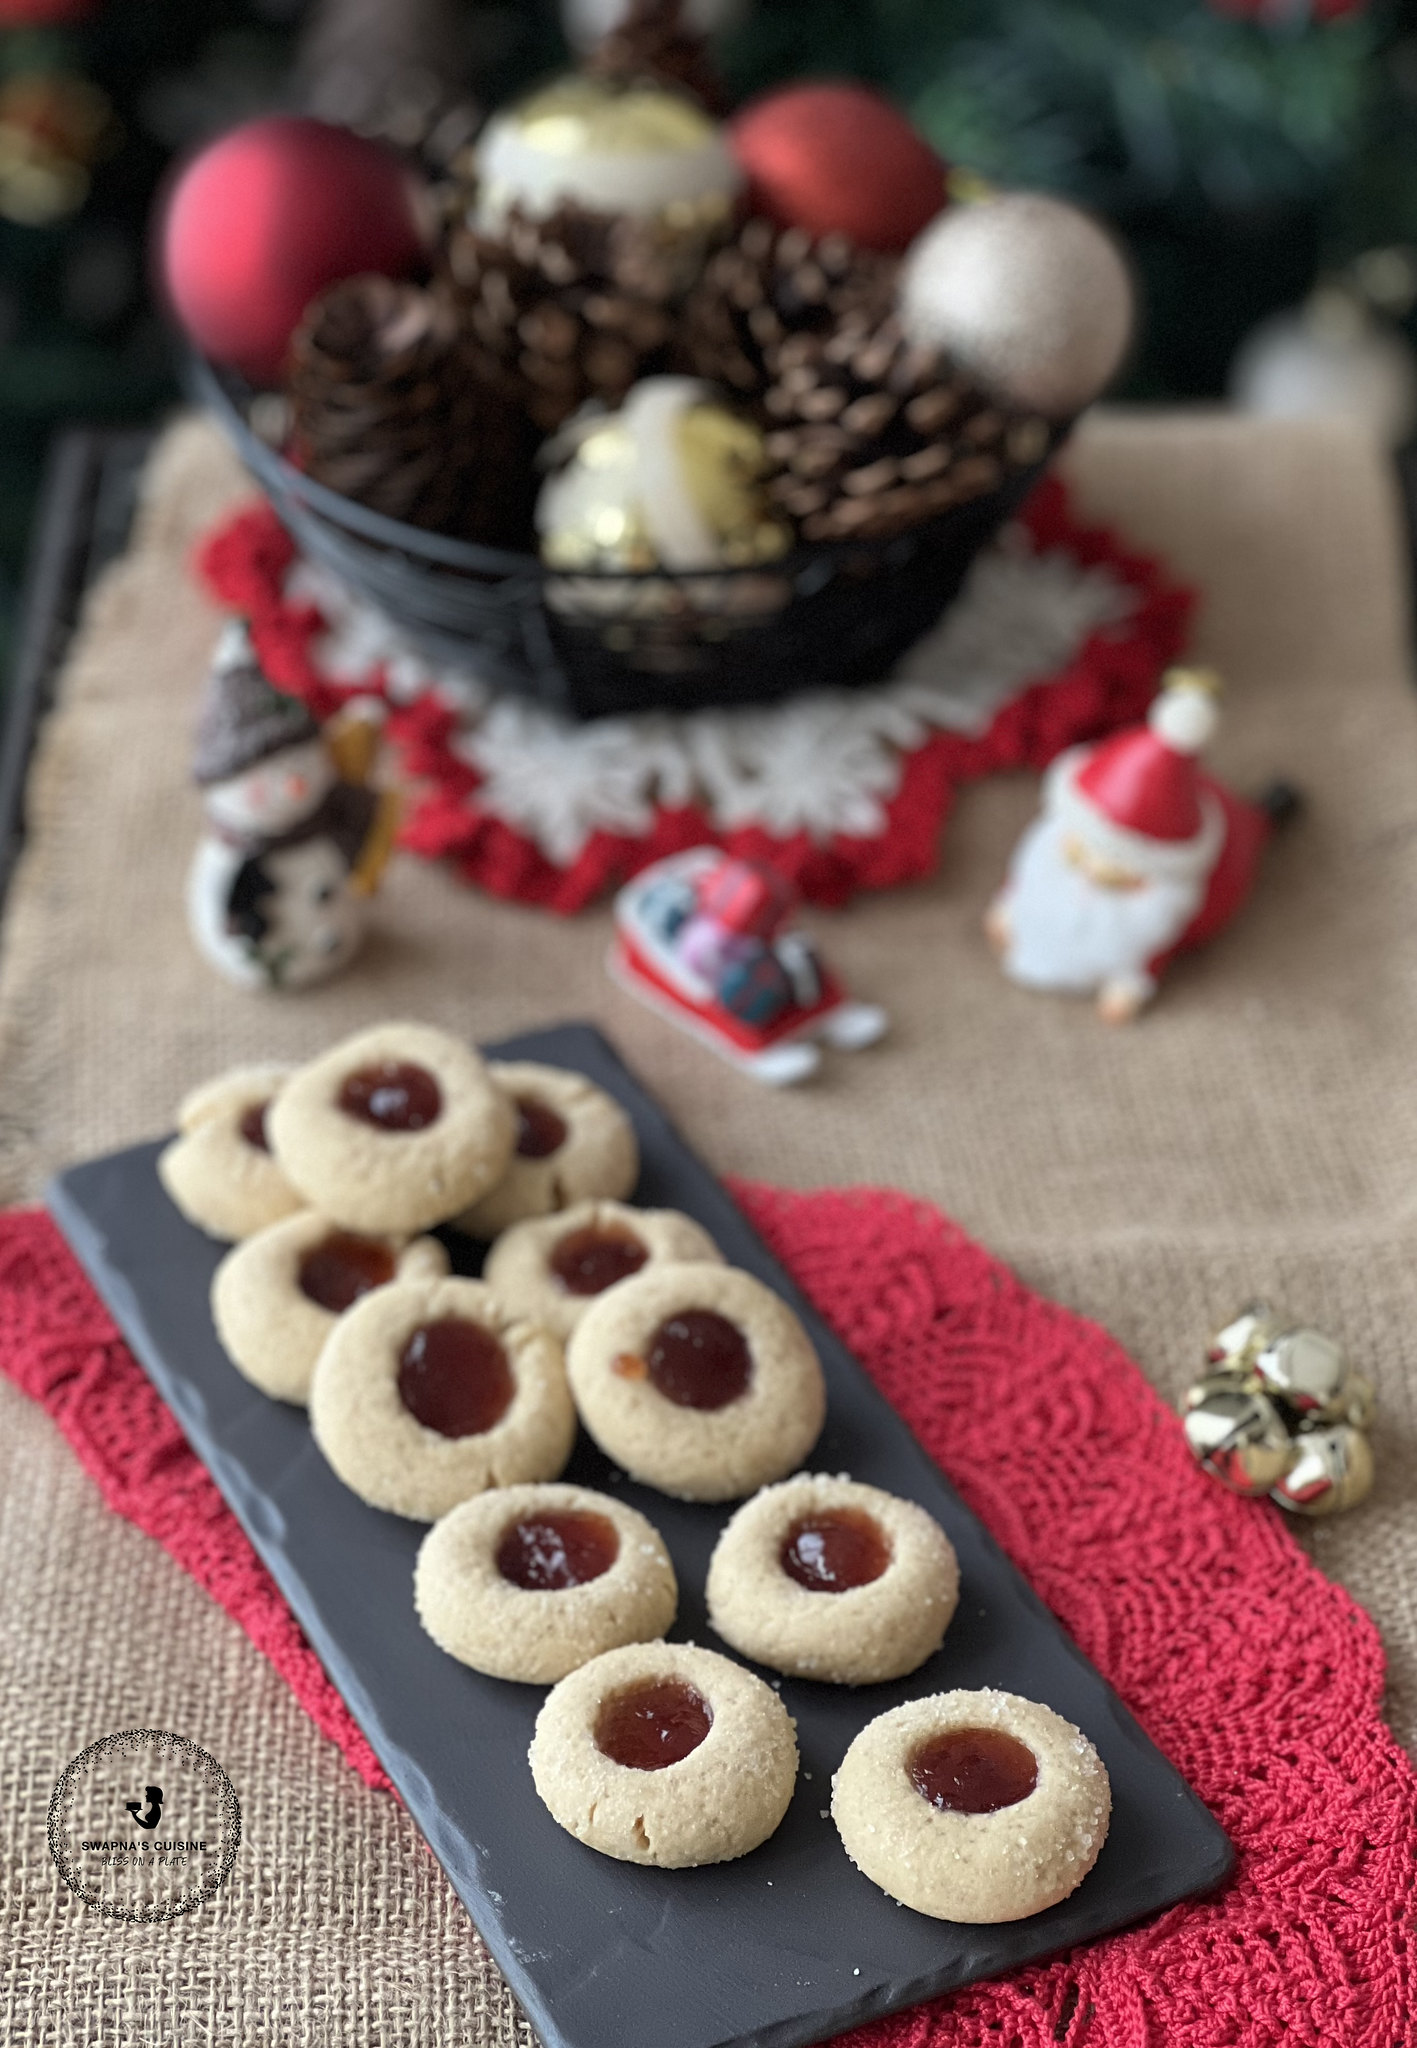
Hello everyone, hope you all had a great Christmas! Thought of ending the year with this cute Thumbprint Cookies recipe that I tried couple of times and came out well. It’s a very easy recipe, you can fill the cookies with any jam/preserve or even citrus curd of your liking. Do try and let me have your feedback.


Thumbprint Cookies

(From here)

Ingredients:

Unsalted butter - 1 cup (226g), softened to room temperature

Sugar - ⅓ cup (70g)

Light brown sugar - ⅓ cup(70g), tightly packed 

Egg yolk -1 large 

Vanilla extract - ¾ tsp 

All-purpose flour -2 ¼ cup (280g)

Cornflour - 2 tsp 

Salt - ½ tsp 

Sugar - ½ cup for rolling (optional)

Jam or preserves -  cup (I used strawberry jam)

Method:

  • Place butter in the bowl of a stand mixer and beat until creamy.
  • Scrape down the sides of the bowl, add sugars, and beat, gradually increasing mixer speed to medium-high until ingredients are well-combined.
  • Add egg yolk and vanilla extract and beat well.
  • In a separate bowl, whisk together flour, cornflour, and salt. 
  • With mixer on low speed, gradually add flour mixture to wet ingredients until completely combined.  This dough will seem very dry and crumbly, so be sure to pause occasionally to scrape the sides and bottom of the bowl. 
  • Scoop cookie dough into small sized balls and roll very well.
  • Roll in granulated sugar (if using) and place on a wax-paper covered plate or small cookie sheet.  Use your thumb or the rounded back of a teaspoon to gently press an indent in the centre of the cookie dough.  Repeat until all the dough has been used.
  • Transfer cookie dough to freezer and chill for 30 minutes.
  • Once dough is done chilling, preheat oven to 375F (190C) and place your jam in a small microwave-safe bowl.  Heat 5-10 seconds or until jam is no longer firm and is easy to stir.
  • Spoon jam into each thumbprint, filling each indent to the brim.  
  • Once oven is preheated, place cookies at least 2" apart on a parchment paper-lined cookie sheet and bake on 375F (190C) for 11 minutes or until edges are just beginning to turn golden brown.
  • Allow cookies to cool completely on baking sheet and store in an airtight container.


Read More » Print Friendly and PDF

Saturday 25 December 2021

Merry Christmas 🎄🎅🏻


Read More » Print Friendly and PDF

Thursday 9 December 2021

Plum Wine Recipe


Hello everyone, How are the Christmas preparations coming along? I hope at least some of you have tried some wine this year. If you are on the lookout for recipes for baking Christmas Cakes & Cookies you can search my older posts.... Since Christmas is around the corner, I thought of posting a new wine recipe 
that I tried recently.... Hope you guys include some of my recipes in our Christmas and New Year Menu…Do let me know if you guys try anything from my blog…..Wishing you all a happy & healthy holiday season with your loved ones!


Plum Wine 

Ingredients:

Plum – 1kg

Sugar- 1.25 kg (you can add only 1kg if you like dry wine)

Lime juice of 1 lime

Yeast- ½ tsp

Water- 4 liters 

Method:

  • Wash plums well, Wipe water from each plum very well and chop roughly and keep aside
  • Boil the water and sugar keep aside to cool down slightly.
  • In a big bharani / bottle add chopped plums and hot sugar water and lime juice, stir well.
  • When the mixture becomes lukewarm, sprinkle yeast on top and mix well after 5 minutes. 
  • When the mixture cools down completely, tie the bottle with a clean cloth or close with lid little loose. 
  • Stir this mixture every day for 5 minutes.
  • After 20 days, strain the mixture through a cheese/ muslin cloth in to a clean dry bottle.
  • Keep this again for 7 days untouched. After 7 days strain the wine again, pour it in to clean dry bottles and use. 

 Check out Tips for Making Homemade KeralaWines

Read More » Print Friendly and PDF

Wednesday 8 December 2021

Carrot Wine / Carrot Whisky

Enjoy this Christmas Season with Carrot Wine!!!

Wine makes every meal an occasion, every table more elegant, every day more civilized. ~ Andre Simon, "Commonsense of Wine"


Carrot Wine

Ingredients:
Carrot -3kg
Orange -2 nos
Lime -2 nos
Sugar -2kg
Raisins -300 gms (chopped)
Whole wheat - 1/2 kg
Water -5 liter
Yeast - 1 tbsp

Method:
  • Clean & chop the carrots and boil with 5 liters of water.
  • Transfer this to a bharani or a big glass bottle and add lime & orange juice & peel. (Cut the orange & lime in half, and extract the juice, using a citrus fruit juicer. Remove the orange peel and scrape off any white pith from the inside. Chop up the peel and mix it with the carrot mixture).

  • Then add sugar. When the mixture becomes cool, add raisins, whole wheat and yeast.
  • Tie the bottle with a clean cloth and keep aside the mixture for 3 weeks.
  • Stir this mixture everyday for 5 minutes.
  • After 3 weeks strain the mixture to a clean bottle and keep this mixture again for 3 more weeks untouched.
  • After that slowly strain the upper part to small bottles and use.
  • The peach colour of this wine will change to a richer whisky colour with aging!
Note:
  • All the utensils & bottle should be clean & dry. If there is water the wine will become sour.
  • Don't fill the bottle to the brink. Always leave 1/4 bottle empty.


Read More » Print Friendly and PDF

Monday 13 September 2021

Trending Top Forward Cake


Red Velvet Cake with a Rustic Concrete finish Cream Cheese Frosting decorated with Sugar Flowers on one side and a touch of Stencilling on the other side.
My first try on the #caketopforward trend by @delaneydesserts


Read More » Print Friendly and PDF

Sunday 29 August 2021

The Baby Giraffe Bust Cake


I made this adorable baby giraffe using vanilla cake, modelling chocolate and fondant for my son’s 17th birthday, and hand painted it with cocoa butter to create realistic features and texture. This is my first structural cake as well as my first-time painting with cocoa butter. Really enjoyed creating this masterpiece.


Read More » Print Friendly and PDF

Thursday 5 August 2021

Panikoorka Wine / Mexican Mint Wine / Indian Borage Wine

Panikoorka, is popularly used in South Indian states to treat coughs and colds in children. The herb is also used to treat a variety of health problems in both children and adults. This plant is known as Indian Borage, Mexican Mint or Cuban Oregano. In Kerala, regionally, Panikoorka is also known as Karpooravalli, Navara, Kanjikoorka etc. In Kerala, people say that you should grow the panikoorka plant in your house if you have children.

I was never successful in growing this plant here when my son was small. Two years back I bought a couple of plant stems from back home and luckily it started growing well. I tried adding these leaves in many dishes in place of oregano & mint and was pleasantly surprised with the results. We also enjoyed fresh lemonade with panikoorka leaves in it. Then the idea of making wine with panikoorka leaves struck me and when I tried it, it came out super tasty. Do try wine with these healthy leaves and let me know whether you liked it.


Panikoorka Wine / Mexican Mint Wine / Indian Borage Wine

Ingredients:

Panikoorka Leaves - 4 to 5 cups firmly packed

Sugar - 1 ¼ kg

Water - 3 ½ liter

Lemon juice - ½ cup

Lemon zest of 2 lemons

Yeast - ½ tsp

Method:

  • Thoroughly wash panikoorka leaves and chop and place it in a big vessel.
  • Bring half of water to a boil and pour boiling water over panikoorka leaves.
  • Mix and cover the vessel with a lid and stand for around one hour.
  • Strain the panikoorka liquor into a sterilized fermentation bottle / bharani.
  • Boil the remaining water and pour boiling water to the strained panikoorka leaves and wait for another one hour, strain into the bottle and discard the leaves.
  • Add all the other ingredients to the bottle like sugar, lemon juice, lemon zest and yeast.
  • Stir the mixture well until all the sugar has completely dissolved.
  • Cover the bottle and stir the mixture every day for 21 days.
  • After 21 days, strain the mixture through a cheese/ muslin cloth into clean and dry bottles and use.
  • After 21 days you can consume the wine, but it will be little cloudy and not very clear. If you allow the panikoorka wine to stand for couple of months you will get a very clear wine like in the picture.

My Panikoorka Plant 

Read More » Print Friendly and PDF

Wednesday 7 July 2021

Mango Tres Leches / Mango Three Milk Cake


Many years ago I posted a Vanilla Tres Leches Cake recipe which was loved by many of my readers. Recently, I tried a mango flavoured version with an eggless sponge. It was a huge hit in our home. This time I assembled the cake in individual serving glasses and by now you all know how I love preparing desserts as individual servings. Assembling in individual glasses is more tedious and time consuming, but you can easily assemble this in the same dish which you used to bake the cake for a more effortless job. Do try this and let me know how you liked it. 


Mango Tres Leches / Mango Three Milk Cake

(6 servings)

Eggless Sponge Cake:
Ingredients:

All-purpose flour - 1⅔ cup (180gm)

Baking Soda – ½ tsp 

Baking Powder – ¾ tsp

Salt – ¼ tsp

Butter Milk - 1 cup

Vegetable oil - ¼ cup

Sugar - ⅔ cup

Vanilla Extract - 1 tsp

Apple Cider Vinegar – 1 tsp

Method:

  • Preheat the oven to 180C. Lightly grease one 9” round or square pan or two  5” round pans.
  • In a large bowl, whisk together the buttermilk, oil, sugar and vanilla extract well. Add the apple cider vinegar, baking powder, baking soda and salt and whisk again. Leave to stand for 5 minutes until bubbly.
  • Now sift over the plain flour and whisk in to mix.
  • Divide the batter between the prepared baking dishes,
  • Tap the dishes gently on the counter, then bake for 25-30 minutes until light golden brown and the tester comes out clean.
  • Remove to rack, demould after 10-15 minutes, then cool completely.
  • Once the cake has completely cooled cut out rounds to fit your serving glasses / bowl. 
  • Poke holes all over the cake using a fork to better absorb the Mango Tres Leches syrup.

For Mango Tres Leches Syrup

1 cup thick mango puree or 2 ripe mangoes

½ can (200 gm) sweetened condensed milk

¾ cup evaporated milk

¾ cup heavy cream or whipping cream

  • Puree mango pieces in a blender without adding any water. Then add condensed milk, evaporated milk and whipping cream and blend again. Mango Tres Leches syrup is ready.
  • Reserve ¼ cup of the syrup to add to the topping mix. Then divide the milk mixture and pour over each cake.
  • Leave for a couple of hours to soak the  milk.

Cream Topping

1 cup (250ml) whipping cream

3 tbsp icing sugar

¼ cup of reserved mango Tres Leches syrup

Diced mangoes, fresh cherries and mint leaves to decorate

  • Whip the cream, when soft peaks form add the sugar and the reserved ¼ cup of the mango Tres Leches syrup little by little, continue whipping until stiff peaks form about 2 mints.
  • Layer the whipped cream mix over the soaked cake, Garnish with diced mango pieces, cherries and mint leaves. Best to rest the cake in the fridge overnight to complete the soaking process and serve.   


Read More » Print Friendly and PDF

Sunday 28 March 2021

Tomato Wine Recipe

By now you all know how I love to experiment brewing wine with different fruits or vegetables… Trying out Tomato Wine recipe was in my mind for quite some time and so I made this a year ago… I was curious to know how the taste & colour would turn out… surprisingly the wine tasted nice. It is quite a strong wine… it has a slightly fruity taste and does not really taste like tomatoes… I really love the golden colour… do give it a try and let me know how you guys liked it 😊 


Tomato Wine

Ingredients:

Red ripe Tomatoes - 1 kg

Raisins - 175gm

Sugar - 750gm + 250 gm

Water - 3 litres

Yeast - ½ tsp

Lemon zest & lemon Juice from 1 big lemon (You can substitute it with orange zest and orange juice if you wish)

Method:

  • Boil water and 750 gm sugar and cool it till lukewarm.
  • Wash & pat dry the tomatoes. Finely chop or mash tomatoes with a potato masher.
  • Add tomatoes & raisins to the warm sugar water.
  • Mix well and add yeast, lemon juice & lemon zest. Be very careful not to add any white pith of lemon or orange with the zest.
  • Mix all the ingredients well and keep it in an earthen jar (Bharani) or in a glass jar, cover it and leave for 21 days, stirring daily.
  • On 22nd day, strain the mixture through a cheese / muslin cloth.
  • At this stage if the wine is not sweet enough for your liking, you can add rest of the 250 grams of sugar mix well and keep it again in a clean dry Bharani / glass bottle for another 21 days.
  • Strain on the 22nd day bottle and use.
  • The taste will be more flavourful if you wait for it to age for two to three months after bottling.

Read More » Print Friendly and PDF

Saturday 13 March 2021

Passion Fruit Mousse (Eggless)


I have some passion fruit pulp in my freezer that my Appa gave me on my last vacation in 2019… that was the last batch of passion fruit pulp which he gave me before he passed away… I just kept it in the freezer, untouched all this while, and recently when I missed him a lot, I took it out and made this passion fruit mousse… I still have one huge bottle in the freezer, that I am keeping like a treasure, to use occasionally when I miss him terribly…

This passion fruit mousse is easy to make… you just need a blender or hand mixy… no cooking involved, and it is eggless too… Passion fruit pulp can be added according to taste… 1 cup of the pulp to the mousse will give you a very mild taste of passion fruit. I like the passion fruits tangy flavour a lot, so I ended up adding 1 ⅔ cup of pulp. If you are adding only one cup of pulp you can omit sugar. This mousse has a very creamy consistency. I suggest you set the mousse in individual glasses or ramekins instead of one bowl…

I have tried to take a video while making the mousse and I am attaching the YouTube video with this recipe… since I am not an expert in taking videos there are lot of flaws in it and I am trying hard to improve… I hope it will be helpful to some of you 😊


Passion Fruit Mousse

(Recipe adapted from here)

Ingredients

For the mousse:

Sweetened Condensed Milk - 1 can (397g)

Heavy cream / whipping cream (cold) - 1 ⅓ cups (290g)

Passion fruit pulp – 1 to 1 ⅔ cup (according to taste)

Gelatin -1 tsp (If you are planning to set the mousse in one large bowl use 2 tsp of gelatin)

Sugar -  ¼ cup (optional, add less or omit if it is sweet enough with the condensed milk)

Water - 3 tbsp

For the Topping:

Pulp of 3 fresh passion fruits, with seeds (about ⅔ cup)

Sugar -  ¼ cup

Method:

  • To make Passion fruit pulp, blend the pulp with ¼ cup water for a few minutes and strain through a fine mesh sieve.
  • Dissolve gelatin in 3 tbsp water in a small bowl and let it swell for 5 minutes. Microwave the mix for 30 seconds. Cool slightly before using.
  • Combine the heavy cream, sweetened condensed milk, passion fruit pulp, sugar, and melted gelatin in the blender. Blend for 5 minutes.
  • Transfer the mousse to individual glasses or ramekins or to a large serving tray. Refrigerate for at least 3 hours to set.
  • Top with the passion fruit sauce and serve. 

To make the topping:

  • Combine the fresh passion fruit pulp with seeds and the sugar in a saucepan.
  • Bring to a boil over medium heat. Cook for two more minutes, until it thickens slightly.
  • Let it cool to room temperature and serve with mousse.


Read More » Print Friendly and PDF

Wednesday 3 February 2021

Salted Caramel Fudge Truffles

I had planned to post this Salted Caramel Fudge recipe for New Year, but the first post of the year got delayed this far… These chocolate dipped, melt- in-mouth caramel truffles are really addictive and I must warn you that you will not be able to stop with just one truffle :) I made these truffles on stove top, but it can be made completely on a microwave and I will be sharing both methods below.  These Truffles are great as one of the items on a dessert table for parties and also are a great option for gifting... Do try these as a Valentine’s day special and let me know how you liked it...


Salted Caramel Fudge Truffles
(Recipe from here)
Ingredients:
Unsalted Butter - 60 grams (1/4 cup)
Sweetened Condensed Milk - 240 ml (1 cup)
Brown Sugar - 90 grams (1/2 cup)
White Chocolate - 150 grams (1 cup), broken into pieces
Sea Salt - 1/2 teaspoon
Dark or Milk chocolate - 300 grams (2 cups)
Crushed peanut or hazelnuts, optional

Method:

Stove Stop Method:

  • In a medium saucepan, add condensed milk, brown sugar and butter. Place on low heat and stir together until combined and the sugar is dissolved.
  • Turn up the heat to medium and continue to stir until the mixture is simmering and starts to thicken. This may take 5-6 minutes in which time the caramel will be very thick and golden in colour.
  • Remove the caramel mixture from the heat and stir in all the white chocolate. Give it a good stir to make sure the chocolate is melted and mixture is smooth. Lastly, stir in sea salt.
  • Place caramel fudge in the fridge to firm up for at least 3-4 hours.
  • Leave the caramel fudge at room temperature for 5 minutes.
  • Meanwhile, melt the chocolate over a double boiler, stirring until the chocolate is melted and smooth.
  • Scoop out tablespoons of the caramel fudge and roll into a ball.
  • Dip each ball into the melted dark chocolate. Use a fork to scoop out the ball and place on an oven tray lined with baking paper.
  • Repeat with remaining caramel fudge truffles. Top each truffle with crushed nuts (if using).
  • Store truffles in the fridge.
Microwave Method:

  • In a microwave-safe bowl add butter, sweetened condensed milk and brown sugar.
  • Heat in the microwave for approximately 3 minutes, stopping to stir every minute. By the end of the 3 minutes, the butter will be completely melted and the sugar is dissolved. 
  • Give the caramel a good stir, then heat for another 3 minutes, making sure you stir every 30 seconds. If you don’t stir the caramel will get too hot and bubble over. 
  • The caramel wil be very thick and golden in colour. 
  • Add white chocolate. Give it a good stir to make sure the chocolate is melted and mixture is smooth. 
  • Lastly, stir in sea salt.
  • Place caramel fudge in the fridge to firm up for at least 3-4 hours.
  • Leave the caramel fudge at room temperature for 5 minutes.
  • Meanwhile, melt the chocolate in the microwave, stirring every 30 seconds, until melted and smooth.
  • Scoop out tablespoons of the caramel fudge and roll into a ball.
  • Dip each ball into the melted dark chocolate. Use a fork to scoop out the ball and place on an oven tray lined with baking paper.
  • Repeat with remaining caramel fudge truffles. Top each truffle with crushed nuts (if using).
  • Store truffles in the fridge.


Read More » Print Friendly and PDF
Related Posts Plugin for WordPress, Blogger...