Monday, 12 July 2010

Fresh Cherry and Apricot Pie

I was planning on making a cherry pie with a packet of fresh cherries...But the cherry was a little less so I added some Apricots ...the quantity below yields a small pie sufficient for serving 4 people... Addition of Apricots was really good and we all liked it very much....


Fresh Cherry and Apricot Pie

Ingredients:
½ cup Sugar
1 ½ tbsp Cornstarch
¼ tsp Cinnamon
A small pinch of salt
1 ¼ cup pitted Fresh cherries
1 ¼ cup peeled and pitted Apricots, cut in to small pieces
1 ½ tsp fresh Lemon juice
¼ tsp grated Lemon zest
Mostly Butter Pastry
1 tbsp Butter, cut up


Method:
  • Preheat oven to 425F. In a large bowl, combine sugar, cornstarch, cinnamon and salt. Stir in cherries, apricots, lemon juice and lemon zest.
  • On a lightly floured surface, roll out larger pastry disk into a 1/8 inch thick round. Fold into half and ease gently into a small pie pan. Unfold dough, letting pastry overhang edge. Spoon cherry-apricot filling into pie shell and dot with butter.
  • Roll out remaining pastry disk into a 1/8 inch thick round. Cut into ¾ inch wide strips and arrange in a lattice pattern on top of filling, fold edge of bottom pastry up over ends of stripes, building a high edge. Seal and flute.
  • Place pie on a cookie sheet and bake 15 minutes. Reduce oven temperature to 375F. bake 40-45 minutes longer, or until bubbly in center and crust is golden. Transfer to a wire rack. Serve warm or at room temperature.


Mostly Butter Pastry
Ingredients:
1 ½ cups flour
¼ tsp salt
6 tbsp cold butter, cut up
3 tbsp solid vegetable shortening
3-4 tbsp ice water
Method:
  • In a medium bowl, combine flour and salt. Add butter and shortening, tossing gently, until all pieces are coated with flour. With pastry blender or 2 knives, or in food processer or electric mixture, cut in butter and shortening until mixture resembles fine crumbs. Add ice water, 1 tbsp at a time, drizzling over flour mixture, then tossing vigorously with a fork or pulsing or beating very briefly, just until dough begins to hold together.
  • Turn dough out onto smooth surface and gather gently into a ball. Shape dough into 2 balls, one slightly larger than the other. Tightly wrap dough in plastic wrap and flatten into 1 or 2 disks. Refrigerate 1 hour or overnight.


Read More » Print Friendly and PDF

Wednesday, 7 July 2010

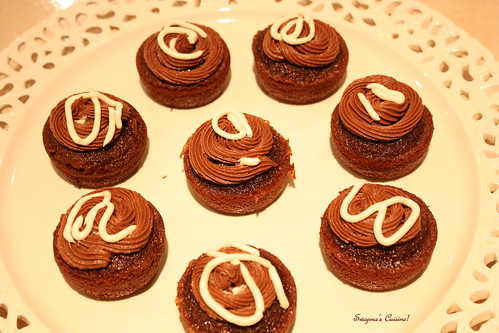
Sweet Punch ~ Devil's Food Cupcakes with Vanilla Cream filling


Sweet Punch challenge for July was hosted by Divya of Easy Cooking and she selected Devil's Food Cupcakes with Vanilla Cream filling from Baking Bites. The recipe consists of three components: making the cupcakes, the filling and the frosting. All three components require lot of butter and it is a very rich cake. I halved the recipe and I regretted it later as my little one really liked it. I enjoyed the challenge and we all appreciated the cake.


Devil's Food Cupcakes with Vanilla Cream filling
Recipe source - Baking Bites

Ingredients
1/2 cup butter, room temperature
2 cups sugar
3 large eggs
3/4 cup sour cream (low fat or full) -can be substituted with yogurt or cream mixed with a tsp of yogurt
1 tsp vanilla extract
2 cups all purpose flour
2 tsp baking soda
1/2 tsp salt
1/4 cup cocoa powder
2-oz dark chocolate
1 cup water, boiling

Method:
  • Preheat the oven to 350F and lightly grease two 12-cup muffin tins.
  • In a large bowl, cream together butter and sugar until light.
  • Beat in eggs one at a time, followed by sour cream and vanilla extract.
  • In a small bowl, whisk together flour, baking soda and salt.
  • Add half of flour mixture to the butter mixture, followed by the sour cream and vanilla extract, followed by the addition of the rest of the flour mix.
  • Stir well between each addition and mix until no streaks of flour remain.
  • Stir the cocoa powder and the dark chocolate into the boiling water (easiest in a large measuring cup).
  • Pour chocolate water into the rest of the batter and stir until uniform.
  • Evenly distribute batter into prepared baking cups.
  • Bake for 13-15 minutes, until a tester comes out clean and the cakes spring back when lightly pressed. (It’s fine if you can’t fit both trays into the oven at the same time, just wait until one batch finishes before putting in the second pan)
  • Turn cupcakes out onto a wire rack to cool completely before frosting and filling.


Vanilla Cream Filling
Ingredients:
3 tbsp all purpose flour
1/2 cup milk (low fat is fine)
1/2 cup butter (or trans fat-free shortening)
1/2 cup granulated sugar
1/2 scraped vanilla bean or 1 tsp vanilla extract

Method:
  • Whisk together the flour and milk and cook in a small saucepan over medium heat until thick. This will only take a few minutes.
  • Stir continuously to prevent the mixture from clumping and do not bring all the way to a boil.
  • When thickened (consistency will be that of a thin pudding or custard), strain with a mesh strainer into a small bowl, cover with plastic wrap and let cool completely to room temperature.
  • When the milk mixture is cool, cream the butter (or shortening) and sugar together in a medium bowl until lightl.
  • Add in the milk/flour mixture and the scraped vanilla bean seeds (or vanilla extract) and beat at high speed with an electrick mixer for 7 minutes, until light and fluffy.
  • Scrape into a pastry bag fitted with a plain tip, or a large ziplock bag with the corner cut off, and set aside until ready to fill your cupcakes.


Chocolate Buttercream Frosting

Ingredients:
1/2 cup butter, room temperature
1/2 cup unsweetened cocoa powder
2-3 cups powdered sugar
1/4 cup milk
1 tsp vanilla extract

Method:
  • Combine all ingredients in a large bowl and beat, with an electric mixer, until frosting is creamy, 3-5 minutes.
  • Add additional powdered sugar as needed to achieve a thick, but not stiff, frosting that is easy to spread.
  • Add additional milk, if necessary, to thin the frosting if it gets too thick.
Assembly (A photo how-to of the assembly method can be found here,,,
  • Take a cooled cupcake and, using a small pairing knife, cut a cone of cake (1-inch across by 1-inch deep) out of the top. Trim off the pointy end of the cone, leaving a flat circle of cake. Set aside and repeat this process for all the cupcakes.Take the cream filling and squeeze a tablespoon or so into each cupcake cavity, filling the hole up to the top with filling. Top off with a flat circle of cake to plug the hole and keep the filling in place.
  • Using a butter knife or a small offset spatula, frost each cupcake with a layer of chocolate buttercream frosting. Place a dollop of icing in the center of the cupcake (on top of the cut out circle of cake) and spread from the center to the sides of the cupcake.If you have leftover filling, transfer it to a fresh ziploc bag and cut a very small opening in one corner. Pipe a swirly line down the center of each cupcake.Store in an airtight container until ready to serve.
  • Makes 2-dozen.


Read More » Print Friendly and PDF

Sunday, 27 June 2010

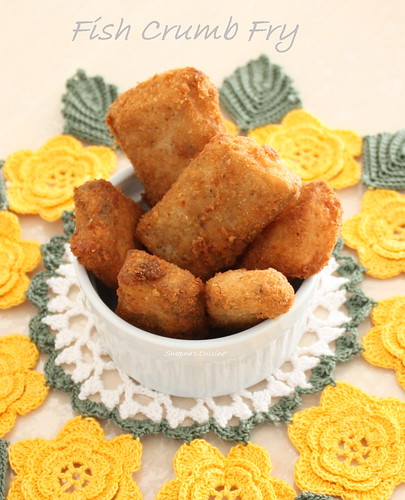
Fish Crumb Fry


Fish Crumb Fry Recipe Source~ Vanitha Pachakam
Ingredients:
King Fish (Motha) or Seer Fish (Neimeen) slices-250gm
Salt- to taste
Maida/All purpose flour-2 tsp
Vinegar-2 tsp
Pepper powder-1/2 tsp or according to taste
Egg-1
Bread crumbs-1/2 cup
Oil-1/2 cup


Method:
  • Clean fish, slice and drain on a kitchen towel.
  • Mix maida, vinegar, pepper powder and salt and apply to fish and leave for 1 hour.
  • Slightly beat the egg and dip each fish pieces in egg and coat in bread crumbs.
  • Deep fry in oil until golden brown and serve hot with tartar sauce or tomato ketchup.

Fish Fingers

Read More » Print Friendly and PDF

Tuesday, 22 June 2010

Mixed Fruit Buckle

Buckle is a baked deep- dish fruit dessert, which combines fresh seasonal fruit and a rich cake batter. Buckle usually has berries in it but I tried this recipe with the fruits I had like nectarines, apricots and mangoes. It was really tasty and we loved it. Please try this and I hope you all enjoy it. You can easily substitute the fruits with blueberries, blackberries or cherries.

Mixed Fruit Buckle

Ingredients:
Nectarines-250gms, peeled and thickly sliced
Apricots-250 gms, pitted and thickly sliced
Mangoes-250 gms, peeled and thickly sliced
Fresh Lemon juice-1 tbsp
Lemon zest, grated -1/4 tsp
Sugar-5 tbsp
Butter- 1 tbsp, cut up
Whipped Cream Biscuit Topping (recipe follows)

Method:

  • Preheat oven to 400F(200C).In a large bowl, combine nectarines, apricots, mangoes, lemon juice and lemon zest. Gently stir in sugar. Turn filling into a pie dish and dot with butter.
  • Prepare Whipped Cream Biscuit Topping and spoon on top of filling. Bake 30-35 minutes, or until topping is golden and fruit is bubbly. Serve warm in shallow bowls.


Whipped cream Biscuit Topping

Ingredients:
Self-rising flour- ¾ cup
Sugar-2 tbsp
Heavy cream-¾ cup


Method:

  • In a medium bowl, combine self-rising flour and sugar. In a large bowl, beat cream with an electric mixer to stiff peaks.
  • Gently fold whipped cream into flour mixture with a rubber spatula just until blended and soft dough forms. Drop by generous tablespoonfuls onto fruit filling.


Read More » Print Friendly and PDF

Tuesday, 15 June 2010

Banana Cake with Penuche Frosting~My 100th Post!!

This delicious Banana cake is really easy to make cake, and you can frost this cake right in the pan with a creamy brown sugar frosting!


Before going to the recipe, this happens to be my 100th post. It has taken almost two and a half years to reach this milestone. I know it’s been very slow going, but I am really happy I have finally reached my 100th post. I am thankful to all my readers and well wishers who continuously encouraged me to blog regularly and a big thanks to my class mate and best friend Bharathy who inspired me to start blogging. Thank you so much because without the support from all you guys I would have never reached this milestone.


Banana Cake with Penuche Frosting
Recipe source: Better Homes & Gardens “Cooking for Today Cakes” book

Ingredients:
2 ½ cups All purpose flour
1 ½ cups granulated Sugar
1 ½ tsp baking powder
1 tsp baking soda
1/2 tsp salt
1 cup mashed ripe bananas (about 3)
2/3 cup butter milk or sour milk*
½ cup shortening
1 tsp vanilla essence
2 eggs
Penuche Frosting (recipe follows)
Chopped Nuts (optional)

Method:


  • Grease a 13x9x2 –inch baking pan. Set aside.

  • In a large mixing bowl combine flour, sugar, baking powder, baking soda and salt. Add bananas, buttermilk or sour milk, shortening and vanilla. Beat with an electric mixer on low speed till combined. Add eggs, beat 2 minutes on medium speed. Pour in to prepared pan.

  • Bake in a 350F (180C) oven about 35 minutes or till a wooden toothpick inserted in center comes out clean. Cool completely in pan on a wire rack.

  • Frost with Penuche Frosting. Immediately sprinkle with chopped nuts if desired.

  • Makes 12 to 16 servings.


Penuche Frosting:
Ingredients:


1/3 cup butter or margarine
2/3 cup packed brown sugar
3 tbsp milk
2 ½ cups powdered sugar


Method:


  • In a medium sauce pan melt 1/3 cup butter or margarine over medium heat.

  • Stir in 2/3 cup packed brown sugar.

  • Cook and stir till bubbly.

  • Remove from heat. Add 3 tbsp milk, beating vigorously till smooth.

  • By hand, beat in enough sifted powdered sugar (about 2 ½ cups) to make frosting of spreading consistency.

  • Frost cake immediately.


*Note: For sour milk, place 2 tsp lemon juice or vinegar in a measuring cup. Add enough whole milk to make 2/3 cup.


Read More » Print Friendly and PDF

Monday, 7 June 2010

Tiramisu Cake ~ First Sweet Punch Challenge!


The first Sweet Punch challenge was hosted by Ria and she selected Dorie Greenspan’s Tiramisu Cake. I recently made my first Tiramisu with homemade Mascarpone cheese, but Tiramisu Cake was something I had never tried before. I really enjoyed making this cake as much as my DH and son enjoyed eating it.


Verdict:
  • I felt the quantities given for soaking the syrup was not enough. Even after I had used up the entire syrup, the cake was still a little dry. We prefer the Tiramisu cake to be a little more moist…so next time I will definitely make more syrup to soak the cake.
  • I used chocolate chips instead of finely chopped chocolates…but I didn’t enjoy the chocolate bites in-between my cake and filling. So next time I will go for chopped/grated chocolate.
  • I also added 1 1/2 tsp of Orange Sugar to the cake batter and I really liked that orange flavour in my cake.


Tiramisu Cake
Baking: From My Home to Yours by Dorie Greenspan

For the cake layers:
2 cups cake flour
2 teaspoons baking powder
1/8 teaspoon baking soda
1/4 teaspoon salt
1 1/4 sticks (10 tablespoons) unsalted butter, room temperature
1 cup sugar
3 large eggs
1 large egg yolk
1 1/2 teaspoons pure vanilla extract
3/4 cup buttermilk
1 1/2 tsp Orange Sugar (optional)

For the espresso extract:
2 tablespoons instant espresso powder
2 tablespoons boiling water

For the espresso syrup:
1/2 cup water
1/3 cup sugar
1 tablespoon amaretto, Kahlua, or brandy

For the filling and frosting:
1 8-ounce container mascarpone (store-bought or homemade)
1/2 cup confectioners’ sugar, sifted
1 1/2 teaspoons pure vanilla extract
1 tablespoon amaretto, Kahlua, or brandy
1 cup cold heavy cream
2 1/2 ounces bittersweet or semisweet chocolate, finely chopped, or about 1/2 cup store-bought mini chocolate chips
Chocolate-covered espresso beans, for decoration (optional)
Cocoa powder, for dusting


Getting ready:

  • Center a rack in the oven and preheat the oven to 350 degrees F.
  • Butter two 9×2 inch round cake pans, dust the insides with flour, tap out the excess, and line the bottoms of the pans with parchment or wax paper. Put the pans on a baking sheet.

    To make the cake:
  • Sift together the cake flour, baking powder, baking soda, and salt.
  • Working with a stand mixer, preferably fitted with a paddle attachment, or with a hand mixer in a large bowl, beat the butter on medium speed until soft and creamy.
  • Add the sugar and beat for another 3 minutes.
  • Add the eggs one by one, and then the yolk, beating for 1 minute after each addition. Beat in the vanilla; don’t be concerned if the mixture looks curdled.
  • Reduce the mixer speed to low and add the dry ingredients alternately with the buttermilk, adding the dry ingredients in 3 additions and the milk in 2 (begin and end with the dry ingredients); scrape down the sides of the bowl as needed and mix only until the ingredients disappear into the batter.
  • Divide the batter evenly between the two pans and smooth the tops with a rubber spatula.
  • Bake for 28 to 30 minutes, rotating the pans at the midway point.
  • When fully baked, the cakes will be golden and springy to the touch and a thin knife inserted into the centers will come out clean.
  • Transfer the cakes to a rack and cool for about 5 minutes, then run a knife around the sides of the cakes, unmold them, and peel off the paper liners.
  • Invert and cool to room temperature right-side up.


To make the extract:

  • Stir the espresso powder and boiling water together in a small cup until blended. Set aside.

To make the syrup:

  • Stir the water and sugar together in a small saucepan and bring just to a boil. Pour the syrup into a small heatproof bowl and stir in 1 tablespoon of the espresso extract and the liqueur or brandy; set aside.

To make the filling and frosting:

  • Put the mascarpone, sugar, vanilla, and liqueur in a large bowl and whisk just until blended and smooth.
  • Working with the stand mixer with the whisk attachment or with a hand mixer, whip the heavy cream until it holds firm peaks. Switch to a rubber spatula and stir about one quarter of the whipped cream into the mascarpone.
  • Fold in the rest of the whipped cream with a light touch.

To assemble the cake:

  • If the tops of the cake layers have crowned, use a long serrated knife and a gentle sawing motion to even them.
  • Place one layer right-side up on a cardboard round or a cake plate protected with strips of wax or parchment paper. \Using a pastry brush or a small spoon, soak the layer with about one third of the espresso syrup.
  • Smooth some of the mascarpone cream over the layer – use about 1 1/4 cups – and gently press the chopped chocolate into the filling.
  • Put the second cake layer on the counter and soak the top of it with half the remaining espresso syrup, then turn the layer over and position it, soaked side down, over the filling.
  • Soak the top of the cake with the remaining syrup.
  • For the frosting, whisk 1 to 1 1/2 tablespoons of the remaining espresso extract into the remaining mascarpone filling. Taste the frosting as you go to decide how much extract you want to add. If the frosting looks as if it might be a little too soft to spread over the cake, press a piece of plastic wrap against its surface and refrigerate it for 15 minutes or so. Refrigerate the cake too.
  • With a long metal icing spatula, smooth the frosting around the sides of the cake and over the top. If you want to decorate the cake with chocolate-covered espresso beans, press them into the filling, making concentric circles of beans or just putting some beans in the center of the cake.

  • Refrigerate the cake for at least 3 hours (or for up to 1 day) before serving – the elements need time to meld.
  • Just before serving, dust the top of the cake with cocoa.

Read More » Print Friendly and PDF

Wednesday, 2 June 2010

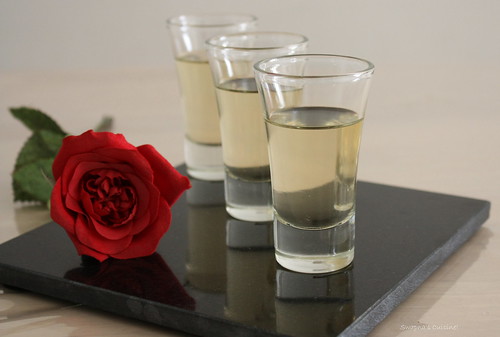
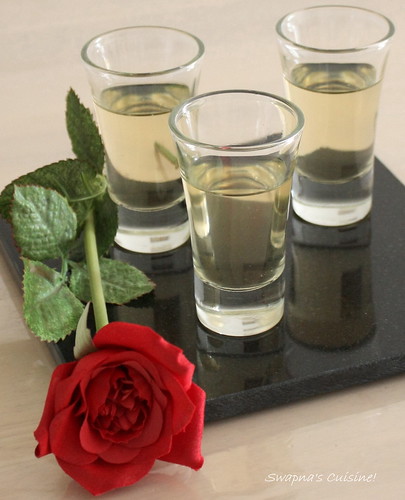
Ginger Wine Recipe

Making good wine is a skill. Fine wine is an art.
~ Robert Mondavi, "Harvests Of Joy," Autobiography


Recently I have received several requests for Ginger Wine recipe. So today I am sharing the recipe that my mom used. It’s very easy to make and the best thing is you don’t need to wait days for the wine to age before drinking as it will be ready in two days time. But of course the longer the wine ages the better it tastes! I like wine to have its natural color for each wine and so I never add caramelized sugar. If you want your ginger wine to be red in color just add caramelized sugar syrup. I hope you enjoy the unique sweet and slightly spicy flavor:)....

Ginger Wine


Ingredients:

Ginger-250gm.
Sugar -1 1/4kg
Dried Red chillies -10nos.
Citric Acid-2tsp.
Caramelized Sugar Syrup (optional)
Water -3 1/2bottle (measure in a 750ml bottle)

Method:
  • Boil water, sugar, grated ginger and chopped chilies together. Reduce the flame and simmer for about 20 minutes. Turn off the gas and keep aside for one day.
  • On the next day drain the syrup in to a big glass bottle and add citric acid.
  • Add cooled caramelized sugar syrup if desired at this stage.
  • Keep aside for one day and drain the wine without shaking the bottle and pour in to small bottles.
  • For Caramelizing the sugar heat 3 tablespoons of sugar until it becomes dark brown on medium flame. Add 1/2-cup hot water to the browned sugar and boil. Turn off the gas and mix with the wine when it becomes cool.

Note:
  • All the utensils & bottle should be clean & dry. If there is water the wine will become sour.
  • Don't fill the bottle to the brink. Always leave 1/4 bottle empty.

Ginger wine
Read More » Print Friendly and PDF

Wednesday, 26 May 2010

Flank Steak, Roasted Pasilla Pepper and Sharp Cheddar Cheese Panini

I love Pam’s blog “For The Love of Cooking”. I have tried her Strawberry and Banana Muffins and they were delicious! She has posted several sandwich/Panini recipes on her blog. One day my hubby happened to see this Panini recipe in my reader and asked me why don’t you make this? He loves steak…so I tried it; the recipe was really simple and easy to make. The only thing is while Pam made this Panini with her left over Carne Asada, I made the Carne Asada to make this Panini. It was really delicious and I have already tried this twice. Thank you Pam for the recipe.


Flank Steak, Roasted Pasilla Pepper and Sharp Cheddar Cheese Panini
Adapted from here

Ingredients:
Flank steak (preferably carne asada, recipe follows)
2 slices of whole wheat sour dough bread (I used brown toast bread)
3 pasilla peppers, roasted (I used Capsicum)
Sharp cheddar cheese
Mayonnaise
Frank's Red Hot Sauce
I aso used some caramelized onions too.
Method:

Roast the Peppers:

  • Clean the pasilla peppers/ Capscumand carefully slit them down the center. Gently remove the seeds from the inside of the pepper. Line a baking sheet with tin foil then place the pepper on top.
  • Broil until peppers are blackened on all sides. Transfer the peppers to a large bowl, cover with plastic wrap, and let cool for 10 minutes.
  • Once the peppers are cool enough to handle, remove the blackened skin and stem gently. Slice into strips.

Prepare the sandwich:

  • Preheat your panini grill or a large skillet over medium heat. Mix a few tablespoons of mayonnaise with a few teaspoons of Frank's Red Hot Sauce; taste and add more hot sauce if desired.
  • Spread the mayonnaise mixture on each slice of bread.
  • Next add the slices of flank steak then roasted pasilla peppers/capscium, caramilised onions and finally the sharp cheddar cheese; top the sandwich with the other slice of bread and place on the panini maker then cook for 5 minutes.
  • If you are using a skillet, cook for 3-4 minutes on each side or until it's golden brown.
  • Slice and serve with extra mayonnaise sauce on the side.
  • Enjoy.


Carne Asada
Carne asada is a roasted beef dish, literally meaning "roasted meat." The dish mainly consists of pieces or thin cuts of beef (e.g. flank steak, skirt steak), sometimes marinated, sometimes lightly salted or rubbed with salt, pepper and/or spices, and then grilled. It can be eaten alone, with side dishes, chopped and eaten as tacos, or chopped and used as filler for tortas, burritos, etc. It is commonly accompanied with guacamole, salsa, beans, and grilled scallions and tortillas. (Source Wikipedia).

Carne Asada Marinade:
Adapted from here.
Ingredients:
1 1/2 - 2 lbs of flank steak
1/3 cup vinegar
1/2 cup soy sauce
1/2 cup olive oil
1 tsp cumin
1-2 tsp black pepper
1 tsp salt
1 tsp garlic powder
1 tsp chili powder
1 tsp paprika
1 tsp onion powder
1 1/2 tsp oregano
2 limes, juiced
4-5 cloves garlic minced
Method:
  • In a gallon size Ziploc bag, combine all ingredients with flank steak and mix really well. Let marinate for at least 6 hours - overnight if you can.
  • Grill steak until desired degree of doneness. Let sit for at least 5-10minutes. Once the meat has cooled, slice across grain into small chunks.

I forgot to take a picture of Carne Asada..will upload photo next time :)

Read More » Print Friendly and PDF

Monday, 24 May 2010

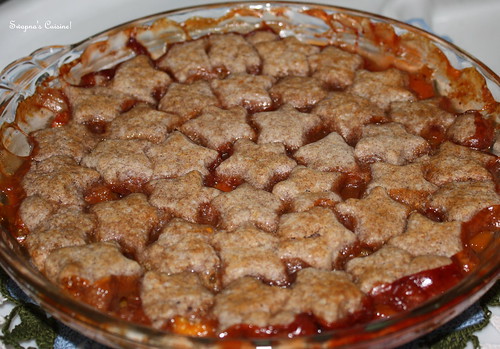
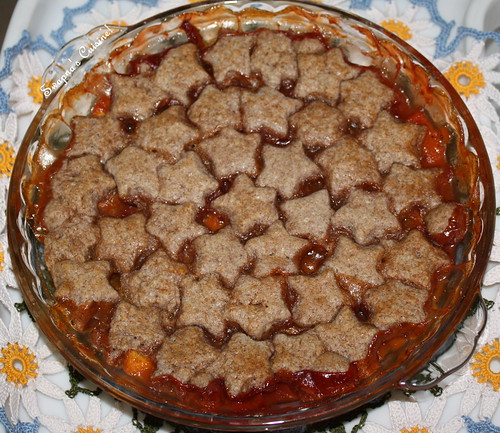
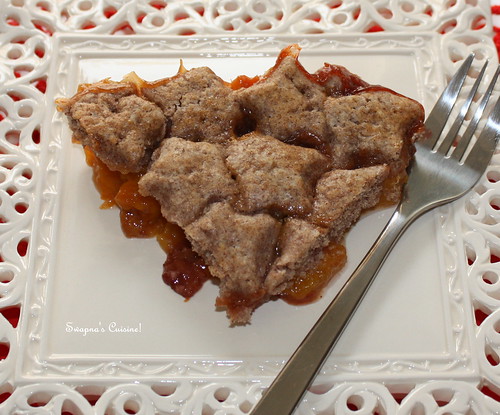
Peach, Mango and Strawberry Cobbler


Recipe slightly adapted from here.
Ingredients:
Fruit Base:
4 Peaches
2 Mangoes
½ cup Strawberries, fresh/frozen
1/2 tsp Lime juice
3 tbsp Sugar
1 tbsp Corn flour
¼ tsp ground Cinnamon

Biscuit Dough:
¾ cup All purpose flour
2 tbsp Ragi/ Finger millet/ Panjapul flour (optional)
2 tbsp Sugar
¾ tsp baking powder
A pinch of salt
2 tbsp cold unsalted butter, cut into pieces
2-3 tbsp milk


Method:
  • Dip the peaches into a large pot of boiling water for about 30 - 60 seconds, depending on the ripeness of the peaches. Transfer the fruit to a large bowl of ice water (this stops the cooking process). The skins should now slip easily off the peaches. Cut the peaches in half, remove the stones, and cut the fruit into thick wedges. Peel and thickly slice mangoes and slice strawberries also.
  • Combine fruits in a large bowl and toss with the lemon juice.
  • In a small bowl, stir together the sugar, corn flour, and ground cinnamon. Sprinkle this mixture over the fruits and toss gently to combine.
  • Transfer to deep pie/ baking dish. Place the baking dish on a larger baking sheet to catch any drips.
  • Preheat oven to 375 degrees F (190 degrees C) and place rack in the center of the oven.

Biscuit Dough:

  • In a large bowl, whisk together both the flours, sugar, baking powder and salt.
  • Cut the butter into small pieces and blend into the flour mixture with a pastry blender or two knives. The mixture should look like coarse crumbs.
  • Add the milk to the flour mixture. Stir just until combined. Do not over mix.
  • Knead dough gently on a lightly floured surface.
  • Roll or pat the dough into a circle that is about 1/2 inch (1.5 cm) thick.
  • Cut the dough into desired shape with a cookie cutter(I used a star cookie cutter).
  • Gently place the stars/ rounds on top of the fruit.
  • Brush the tops of the biscuits with a little cream.
  • Bake for approximately 30-40 minutes or until the fruit is bubbly and the biscuits are golden brown and a toothpick inserted into a biscuit comes out clean. (If the biscuits are getting too brown during baking, and before the fruit is bubbling, cover loosely with a piece of foil.)
  • Remove from oven and place on a wire rack to cool slightly before serving.
  • Serve plain or with softly whipped cream or vanilla ice cream.
  • Refrigerate leftovers and reheat before serving.
Read More » Print Friendly and PDF
Related Posts Plugin for WordPress, Blogger...