Showing posts with label Party Special. Show all posts

Wednesday, 7 July 2021

Mango Tres Leches / Mango Three Milk Cake


Many years ago I posted a Vanilla Tres Leches Cake recipe which was loved by many of my readers. Recently, I tried a mango flavoured version with an eggless sponge. It was a huge hit in our home. This time I assembled the cake in individual serving glasses and by now you all know how I love preparing desserts as individual servings. Assembling in individual glasses is more tedious and time consuming, but you can easily assemble this in the same dish which you used to bake the cake for a more effortless job. Do try this and let me know how you liked it. 



Mango Tres Leches / Mango Three Milk Cake

(6 servings)

Eggless Sponge Cake:
Ingredients:

All-purpose flour - 1⅔ cup (180gm)

Baking Soda – ½ tsp 

Baking Powder – ¾ tsp

Salt – ¼ tsp

Butter Milk - 1 cup

Vegetable oil - ¼ cup

Sugar - ⅔ cup

Vanilla Extract - 1 tsp

Apple Cider Vinegar – 1 tsp

Method:

  • Preheat the oven to 180C. Lightly grease one 9” round or square pan or two  5” round pans.
  • In a large bowl, whisk together the buttermilk, oil, sugar and vanilla extract well. Add the apple cider vinegar, baking powder, baking soda and salt and whisk again. Leave to stand for 5 minutes until bubbly.
  • Now sift over the plain flour and whisk in to mix.
  • Divide the batter between the prepared baking dishes,
  • Tap the dishes gently on the counter, then bake for 25-30 minutes until light golden brown and the tester comes out clean.
  • Remove to rack, demould after 10-15 minutes, then cool completely.
  • Once the cake has completely cooled cut out rounds to fit your serving glasses / bowl. 
  • Poke holes all over the cake using a fork to better absorb the Mango Tres Leches syrup.

For Mango Tres Leches Syrup

1 cup thick mango puree or 2 ripe mangoes

½ can (200 gm) sweetened condensed milk

¾ cup evaporated milk

¾ cup heavy cream or whipping cream

  • Puree mango pieces in a blender without adding any water. Then add condensed milk, evaporated milk and whipping cream and blend again. Mango Tres Leches syrup is ready.
  • Reserve ¼ cup of the syrup to add to the topping mix. Then divide the milk mixture and pour over each cake.
  • Leave for a couple of hours to soak the  milk.

Cream Topping

1 cup (250ml) whipping cream

3 tbsp icing sugar

¼ cup of reserved mango Tres Leches syrup

Diced mangoes, fresh cherries and mint leaves to decorate

  • Whip the cream, when soft peaks form add the sugar and the reserved ¼ cup of the mango Tres Leches syrup little by little, continue whipping until stiff peaks form about 2 mints.
  • Layer the whipped cream mix over the soaked cake, Garnish with diced mango pieces, cherries and mint leaves. Best to rest the cake in the fridge overnight to complete the soaking process and serve.   


Read More » Print Friendly and PDF

Sunday, 28 March 2021

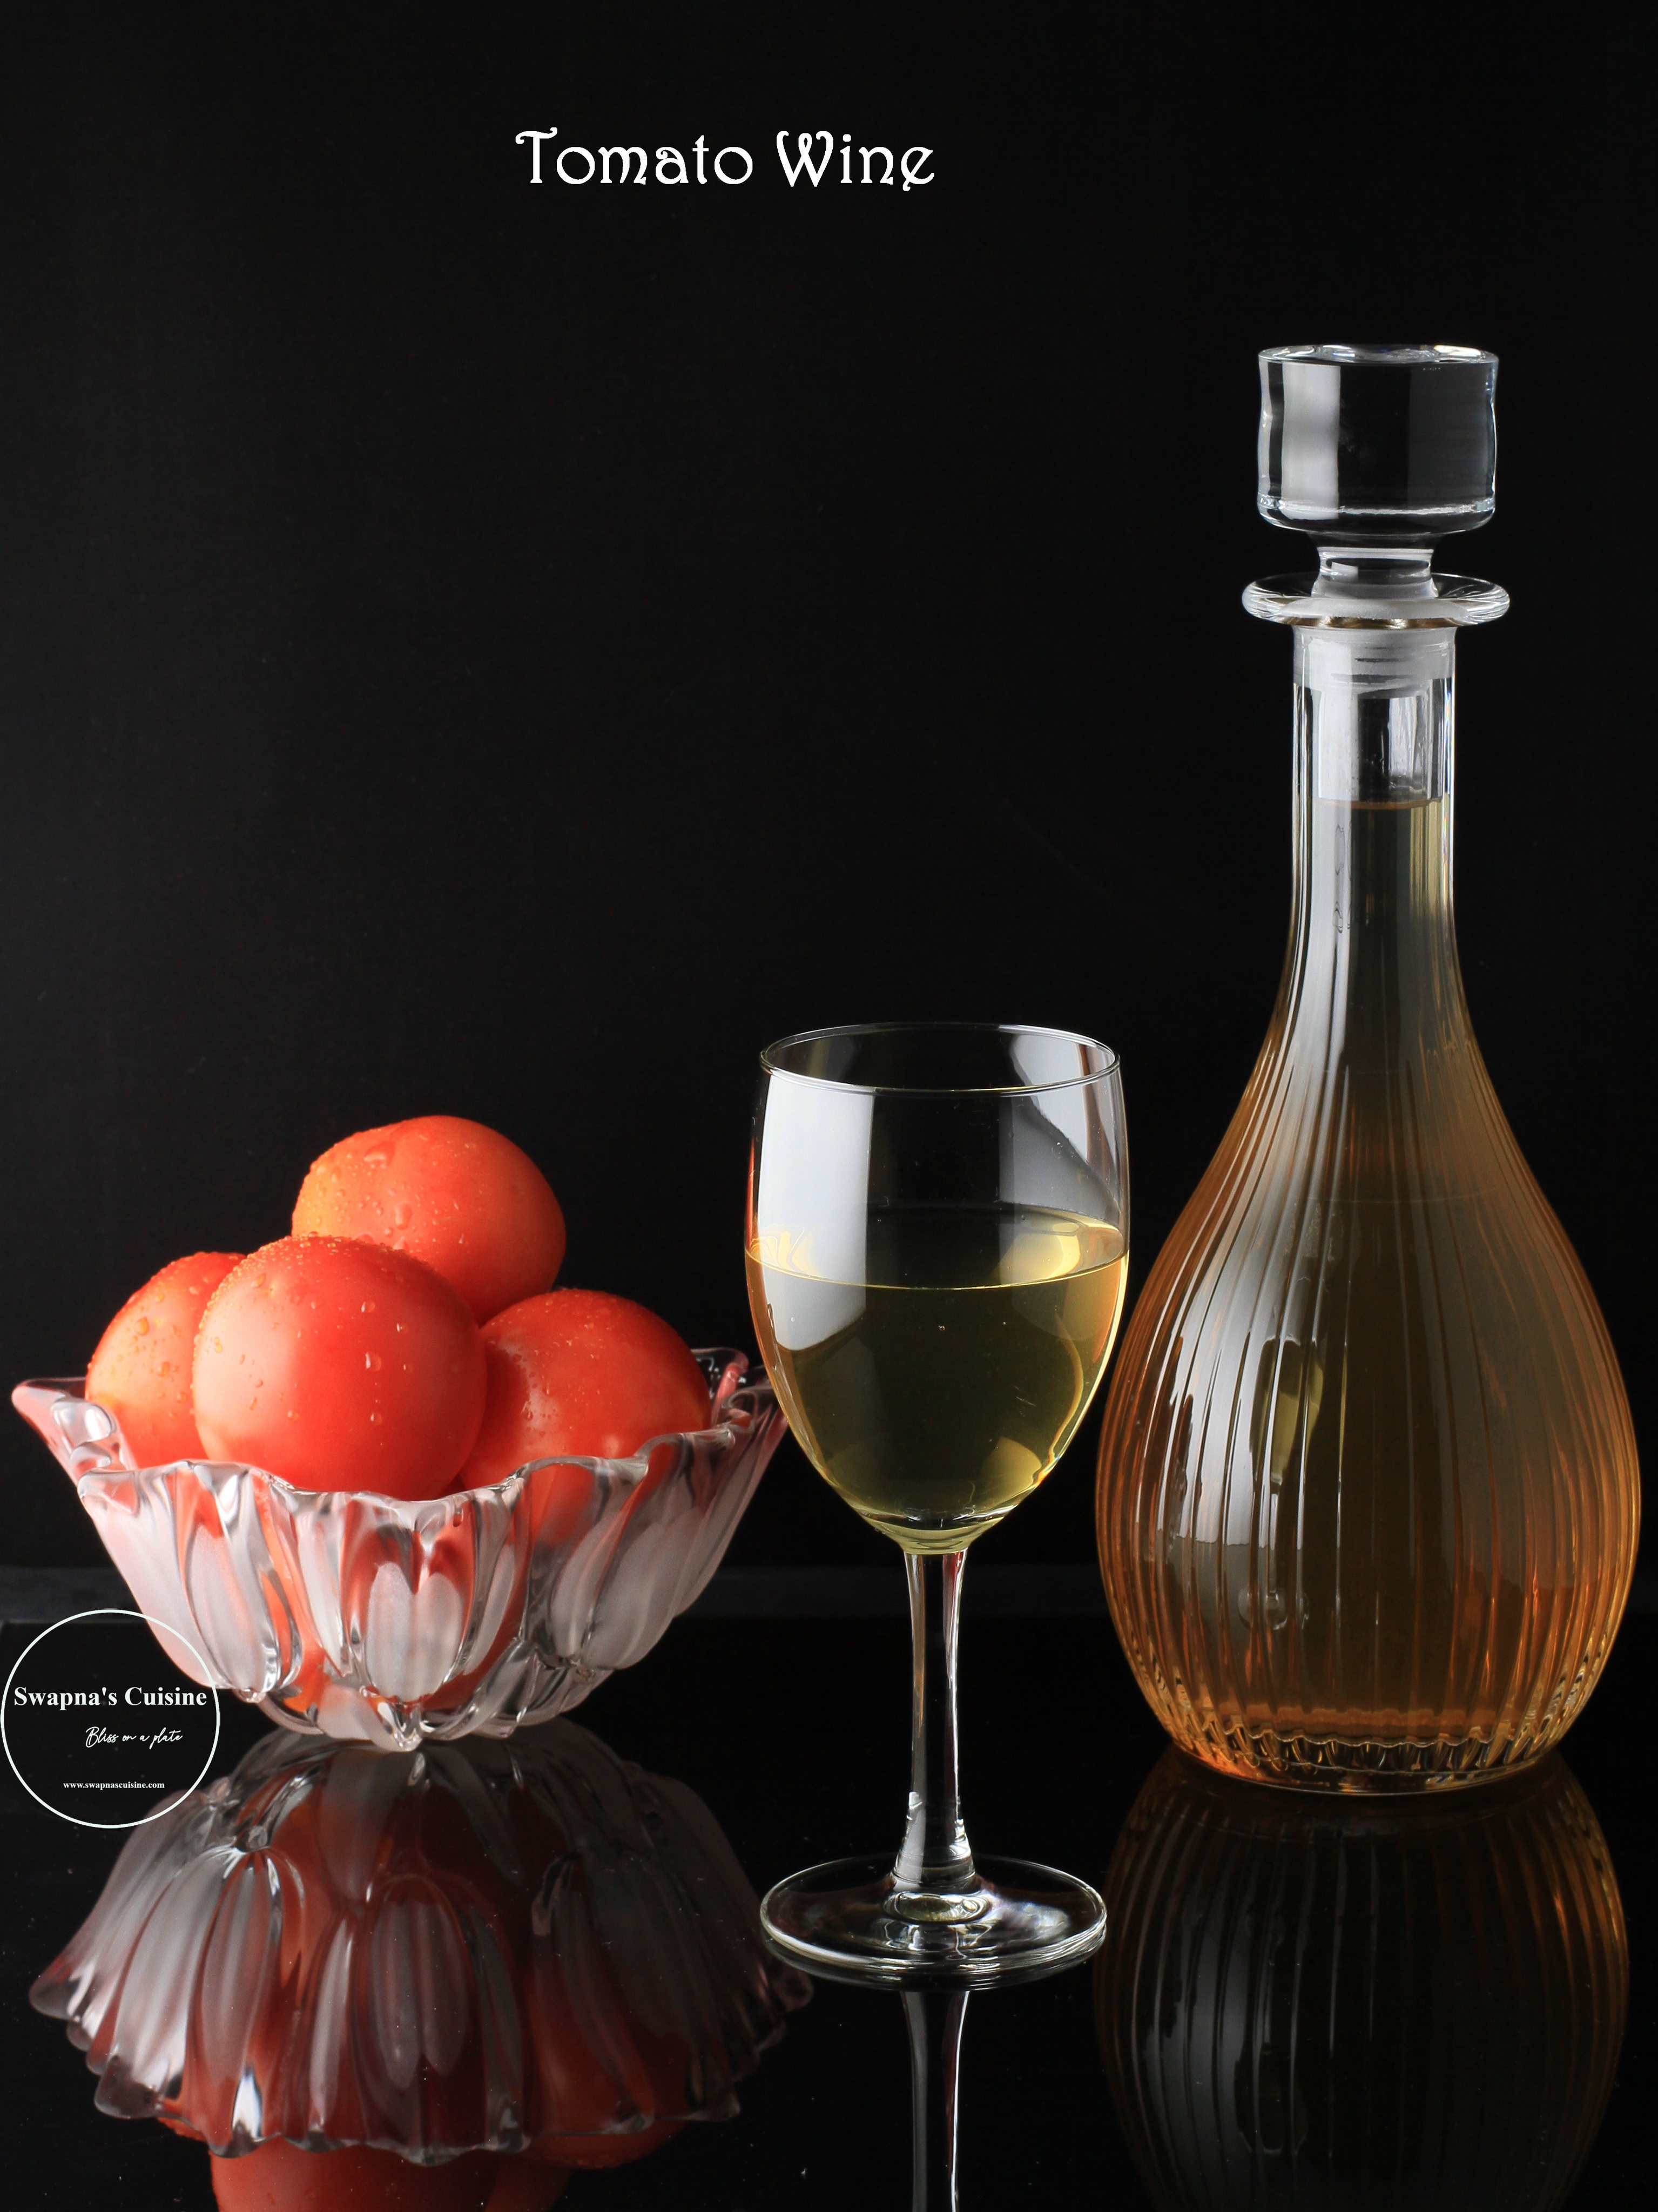
Tomato Wine Recipe

By now you all know how I love to experiment brewing wine with different fruits or vegetables… Trying out Tomato Wine recipe was in my mind for quite some time and so I made this a year ago… I was curious to know how the taste & colour would turn out… surprisingly the wine tasted nice. It is quite a strong wine… it has a slightly fruity taste and does not really taste like tomatoes… I really love the golden colour… do give it a try and let me know how you guys liked it 😊 


Tomato Wine

Ingredients:

Red ripe Tomatoes - 1 kg

Raisins - 175gm

Sugar - 750gm + 250 gm

Water - 3 litres

Yeast - ½ tsp

Lemon zest & lemon Juice from 1 big lemon (You can substitute it with orange zest and orange juice if you wish)

Method:

  • Boil water and 750 gm sugar and cool it till lukewarm.
  • Wash & pat dry the tomatoes. Finely chop or mash tomatoes with a potato masher.
  • Add tomatoes & raisins to the warm sugar water.
  • Mix well and add yeast, lemon juice & lemon zest. Be very careful not to add any white pith of lemon or orange with the zest.
  • Mix all the ingredients well and keep it in an earthen jar (Bharani) or in a glass jar, cover it and leave for 21 days, stirring daily.
  • On 22nd day, strain the mixture through a cheese / muslin cloth.
  • At this stage if the wine is not sweet enough for your liking, you can add rest of the 250 grams of sugar mix well and keep it again in a clean dry Bharani / glass bottle for another 21 days.
  • Strain on the 22nd day bottle and use.
  • The taste will be more flavourful if you wait for it to age for two to three months after bottling.

Read More » Print Friendly and PDF

Saturday, 13 March 2021

Passion Fruit Mousse (Eggless)


I have some passion fruit pulp in my freezer that my Appa gave me on my last vacation in 2019… that was the last batch of passion fruit pulp which he gave me before he passed away… I just kept it in the freezer, untouched all this while, and recently when I missed him a lot, I took it out and made this passion fruit mousse… I still have one huge bottle in the freezer, that I am keeping like a treasure, to use occasionally when I miss him terribly…

This passion fruit mousse is easy to make… you just need a blender or hand mixy… no cooking involved, and it is eggless too… Passion fruit pulp can be added according to taste… 1 cup of the pulp to the mousse will give you a very mild taste of passion fruit. I like the passion fruits tangy flavour a lot, so I ended up adding 1 ⅔ cup of pulp. If you are adding only one cup of pulp you can omit sugar. This mousse has a very creamy consistency. I suggest you set the mousse in individual glasses or ramekins instead of one bowl…

I have tried to take a video while making the mousse and I am attaching the YouTube video with this recipe… since I am not an expert in taking videos there are lot of flaws in it and I am trying hard to improve… I hope it will be helpful to some of you 😊


Passion Fruit Mousse

(Recipe adapted from here)

Ingredients

For the mousse:

Sweetened Condensed Milk - 1 can (397g)

Heavy cream / whipping cream (cold) - 1 ⅓ cups (290g)

Passion fruit pulp – 1 to 1 ⅔ cup (according to taste)

Gelatin -1 tsp (If you are planning to set the mousse in one large bowl use 2 tsp of gelatin)

Sugar -  ¼ cup (optional, add less or omit if it is sweet enough with the condensed milk)

Water - 3 tbsp

For the Topping:

Pulp of 3 fresh passion fruits, with seeds (about ⅔ cup)

Sugar -  ¼ cup

Method:

  • To make Passion fruit pulp, blend the pulp with ¼ cup water for a few minutes and strain through a fine mesh sieve.
  • Dissolve gelatin in 3 tbsp water in a small bowl and let it swell for 5 minutes. Microwave the mix for 30 seconds. Cool slightly before using.
  • Combine the heavy cream, sweetened condensed milk, passion fruit pulp, sugar, and melted gelatin in the blender. Blend for 5 minutes.
  • Transfer the mousse to individual glasses or ramekins or to a large serving tray. Refrigerate for at least 3 hours to set.
  • Top with the passion fruit sauce and serve. 
To make the topping:

  • Combine the fresh passion fruit pulp with seeds and the sugar in a saucepan.
  • Bring to a boil over medium heat. Cook for two more minutes, until it thickens slightly.
  • Let it cool to room temperature and serve with mousse.


Read More » Print Friendly and PDF

Wednesday, 3 February 2021

Salted Caramel Fudge Truffles

I had planned to post this Salted Caramel Fudge recipe for New Year, but the first post of the year got delayed this far… These chocolate dipped, melt- in-mouth caramel truffles are really addictive and I must warn you that you will not be able to stop with just one truffle :) I made these truffles on stove top, but it can be made completely on a microwave and I will be sharing both methods below.  These Truffles are great as one of the items on a dessert table for parties and also are a great option for gifting... Do try these as a Valentine’s day special and let me know how you liked it...


Salted Caramel Fudge Truffles
(Recipe from here)
Ingredients:
Unsalted Butter - 60 grams (1/4 cup)
Sweetened Condensed Milk - 240 ml (1 cup)
Brown Sugar - 90 grams (1/2 cup)
White Chocolate - 150 grams (1 cup), broken into pieces
Sea Salt - 1/2 teaspoon
Dark or Milk chocolate - 300 grams (2 cups)
Crushed peanut or hazelnuts, optional

Method:

Stove Stop Method:

  • In a medium saucepan, add condensed milk, brown sugar and butter. Place on low heat and stir together until combined and the sugar is dissolved.
  • Turn up the heat to medium and continue to stir until the mixture is simmering and starts to thicken. This may take 5-6 minutes in which time the caramel will be very thick and golden in colour.
  • Remove the caramel mixture from the heat and stir in all the white chocolate. Give it a good stir to make sure the chocolate is melted and mixture is smooth. Lastly, stir in sea salt.
  • Place caramel fudge in the fridge to firm up for at least 3-4 hours.
  • Leave the caramel fudge at room temperature for 5 minutes.
  • Meanwhile, melt the chocolate over a double boiler, stirring until the chocolate is melted and smooth.
  • Scoop out tablespoons of the caramel fudge and roll into a ball.
  • Dip each ball into the melted dark chocolate. Use a fork to scoop out the ball and place on an oven tray lined with baking paper.
  • Repeat with remaining caramel fudge truffles. Top each truffle with crushed nuts (if using).
  • Store truffles in the fridge.
Microwave Method:

  • In a microwave-safe bowl add butter, sweetened condensed milk and brown sugar.
  • Heat in the microwave for approximately 3 minutes, stopping to stir every minute. By the end of the 3 minutes, the butter will be completely melted and the sugar is dissolved. 
  • Give the caramel a good stir, then heat for another 3 minutes, making sure you stir every 30 seconds. If you don’t stir the caramel will get too hot and bubble over. 
  • The caramel wil be very thick and golden in colour. 
  • Add white chocolate. Give it a good stir to make sure the chocolate is melted and mixture is smooth. 
  • Lastly, stir in sea salt.
  • Place caramel fudge in the fridge to firm up for at least 3-4 hours.
  • Leave the caramel fudge at room temperature for 5 minutes.
  • Meanwhile, melt the chocolate in the microwave, stirring every 30 seconds, until melted and smooth.
  • Scoop out tablespoons of the caramel fudge and roll into a ball.
  • Dip each ball into the melted dark chocolate. Use a fork to scoop out the ball and place on an oven tray lined with baking paper.
  • Repeat with remaining caramel fudge truffles. Top each truffle with crushed nuts (if using).
  • Store truffles in the fridge.


Read More » Print Friendly and PDF

Friday, 25 December 2020

Grape Wine with Yeast

May the miracle of Christmas fill your heart with warmth and love

Merry Christmas!! 


I had shared a Grape Wine recipe without yeast many years ago. This one is a traditional grape wine recipe with yeast and wheat. Addition of caramelized sugar gives this wine a nice colour and a subtle smoky flavour too, which my husband really enjoys. You do not have to caramelize the sugar very dark for wine as you do for cakes… just caramelize the sugar to light golden colour otherwise the wine will taste bitter! 


Grape Wine with Yeast

(Recipe Source ~ my sister-in-law)

Ingredients:

Black grapes with or without seeds - 2kg

Sugar 1 ¾ kg + ¼ kg for caramelizing (total 2kg)

Wheat  - ¼ kg (wash & sundry the wheat)

Yeast - 1 tbsp

White of one egg

Water - 4 ½ litres

Method:

  • Boil water and cool it till lukewarm.
  • Wash, drain and pat dry the grapes. Brust the grapes slightly with hand or with a potato masher or with back of a spoon.
  • Dissolve yeast in a little lukewarm water.
  • Beat the egg whites well.
  • Mix well all the ingredients along with 1 ¾ kg sugar and keep it in an earthen jar (Bharani) or in a glass jar, cover it and leave for 21 days stirring daily.
  • On 22nd day, strain the mixture through a cheese / muslin cloth.
  • Add ¼ kg sugar caramelised and keep it in jar for another 21 days.
  • Strain on 22nd day and use.

To Caramelize Sugar~ Heat ¼ kg sugar in a pan stirring continuously. When it becomes light golden brown add 1 cup hot water and boil. Cool and then mix it with the wine.

Read More » Print Friendly and PDF

Sunday, 31 May 2020

Japanese Milk Bread Rolls / Hokkaido Milk Bread


Due to Covid19, we are under complete curfew and we are allowed to go for grocery shopping only once a week after taking an online appointment.... So I have been baking different types of breads and buns almost every day.... Seems like my family is enjoying freshly baked homemade breads versus store bought now.... I will post those successful bread recipes I tried in coming posts.... 
Japanese Milk Bread or Hokkaido milk bread is made with a simple technique involving a roux "starter" known as tangzhong.... The roux is mixed into the final dough, producing wonderfully tender bread each and every time... I have made their rolls several times with different shapes over the years.... This bread recipe was used in Sausage Rolls recipe which is one of my initial posts.... Do try these incredibly soft rolls with any shape, be it simple round buns, braided or loaf, you will not regret it....  


Japanese Milk Bread Rolls / Hokkaido Milk Bread
(Recipe from here)
Yield -8 Rolls

Ingredients:
Tangzhong (starter)
3 tablespoons (43g) water
3 tablespoons (43g) whole milk
2 tablespoons (14g) Unbleached Bread Flour / All purpose flour
Dough
2 1/2 cups (298g) Unbleached Bread Flour / All purpose flour
2 tablespoons (18g) Milk Powder
1/4 cup (50g) sugar
1 teaspoon salt
1 tablespoon instant yeast
1/2 cup (113g) whole milk
1 large egg
1/4 cup (4 tablespoons, 57g) melted unsalted butter

Method:
To make the tangzhong: 
  • Combine all of the ingredients in a small saucepan, and whisk until no lumps remain.
  • Place the saucepan over low heat, and cook the mixture, whisking constantly, until thick and the whisk leaves lines on the bottom of the pan, about 3 to 5 minutes.
  • Transfer the tangzhong to a small mixing bowl or measuring cup and let it cool to room temperature.
To make the dough: 
  • Combine the tangzhong with the remaining dough ingredients, then mix and knead — by hand, mixer, or bread machine — until a smooth, elastic dough forms.
  • Shape the dough into a ball, and let it rest in a lightly greased covered bowl for 60 to 90 minutes, until puffy but not necessarily doubled in bulk.
  • Gently deflate the dough, divide it into 8 equal pieces, and shape each piece into a ball, or any desired shape.
  • Place the rolls into a lightly greased 8" or 9" round cake pan. Cover the pan, and let the rolls rest for 40 to 50 minutes, until puffy.  
  • Preheat the oven to 176°C / 350°F. Brush the rolls with milk or egg wash (1 large egg beaten with 1 tablespoon cold water), and bake for 25 to 30 minutes, until golden brown on top; a digital thermometer inserted into the center of the middle roll should read at least 190°F.
  • Remove the rolls from the oven. Allow them to cool in the pan for 10 minutes, then transfer them to a rack and cover with a cloth to cool completely.

Read More » Print Friendly and PDF

Wednesday, 17 May 2017

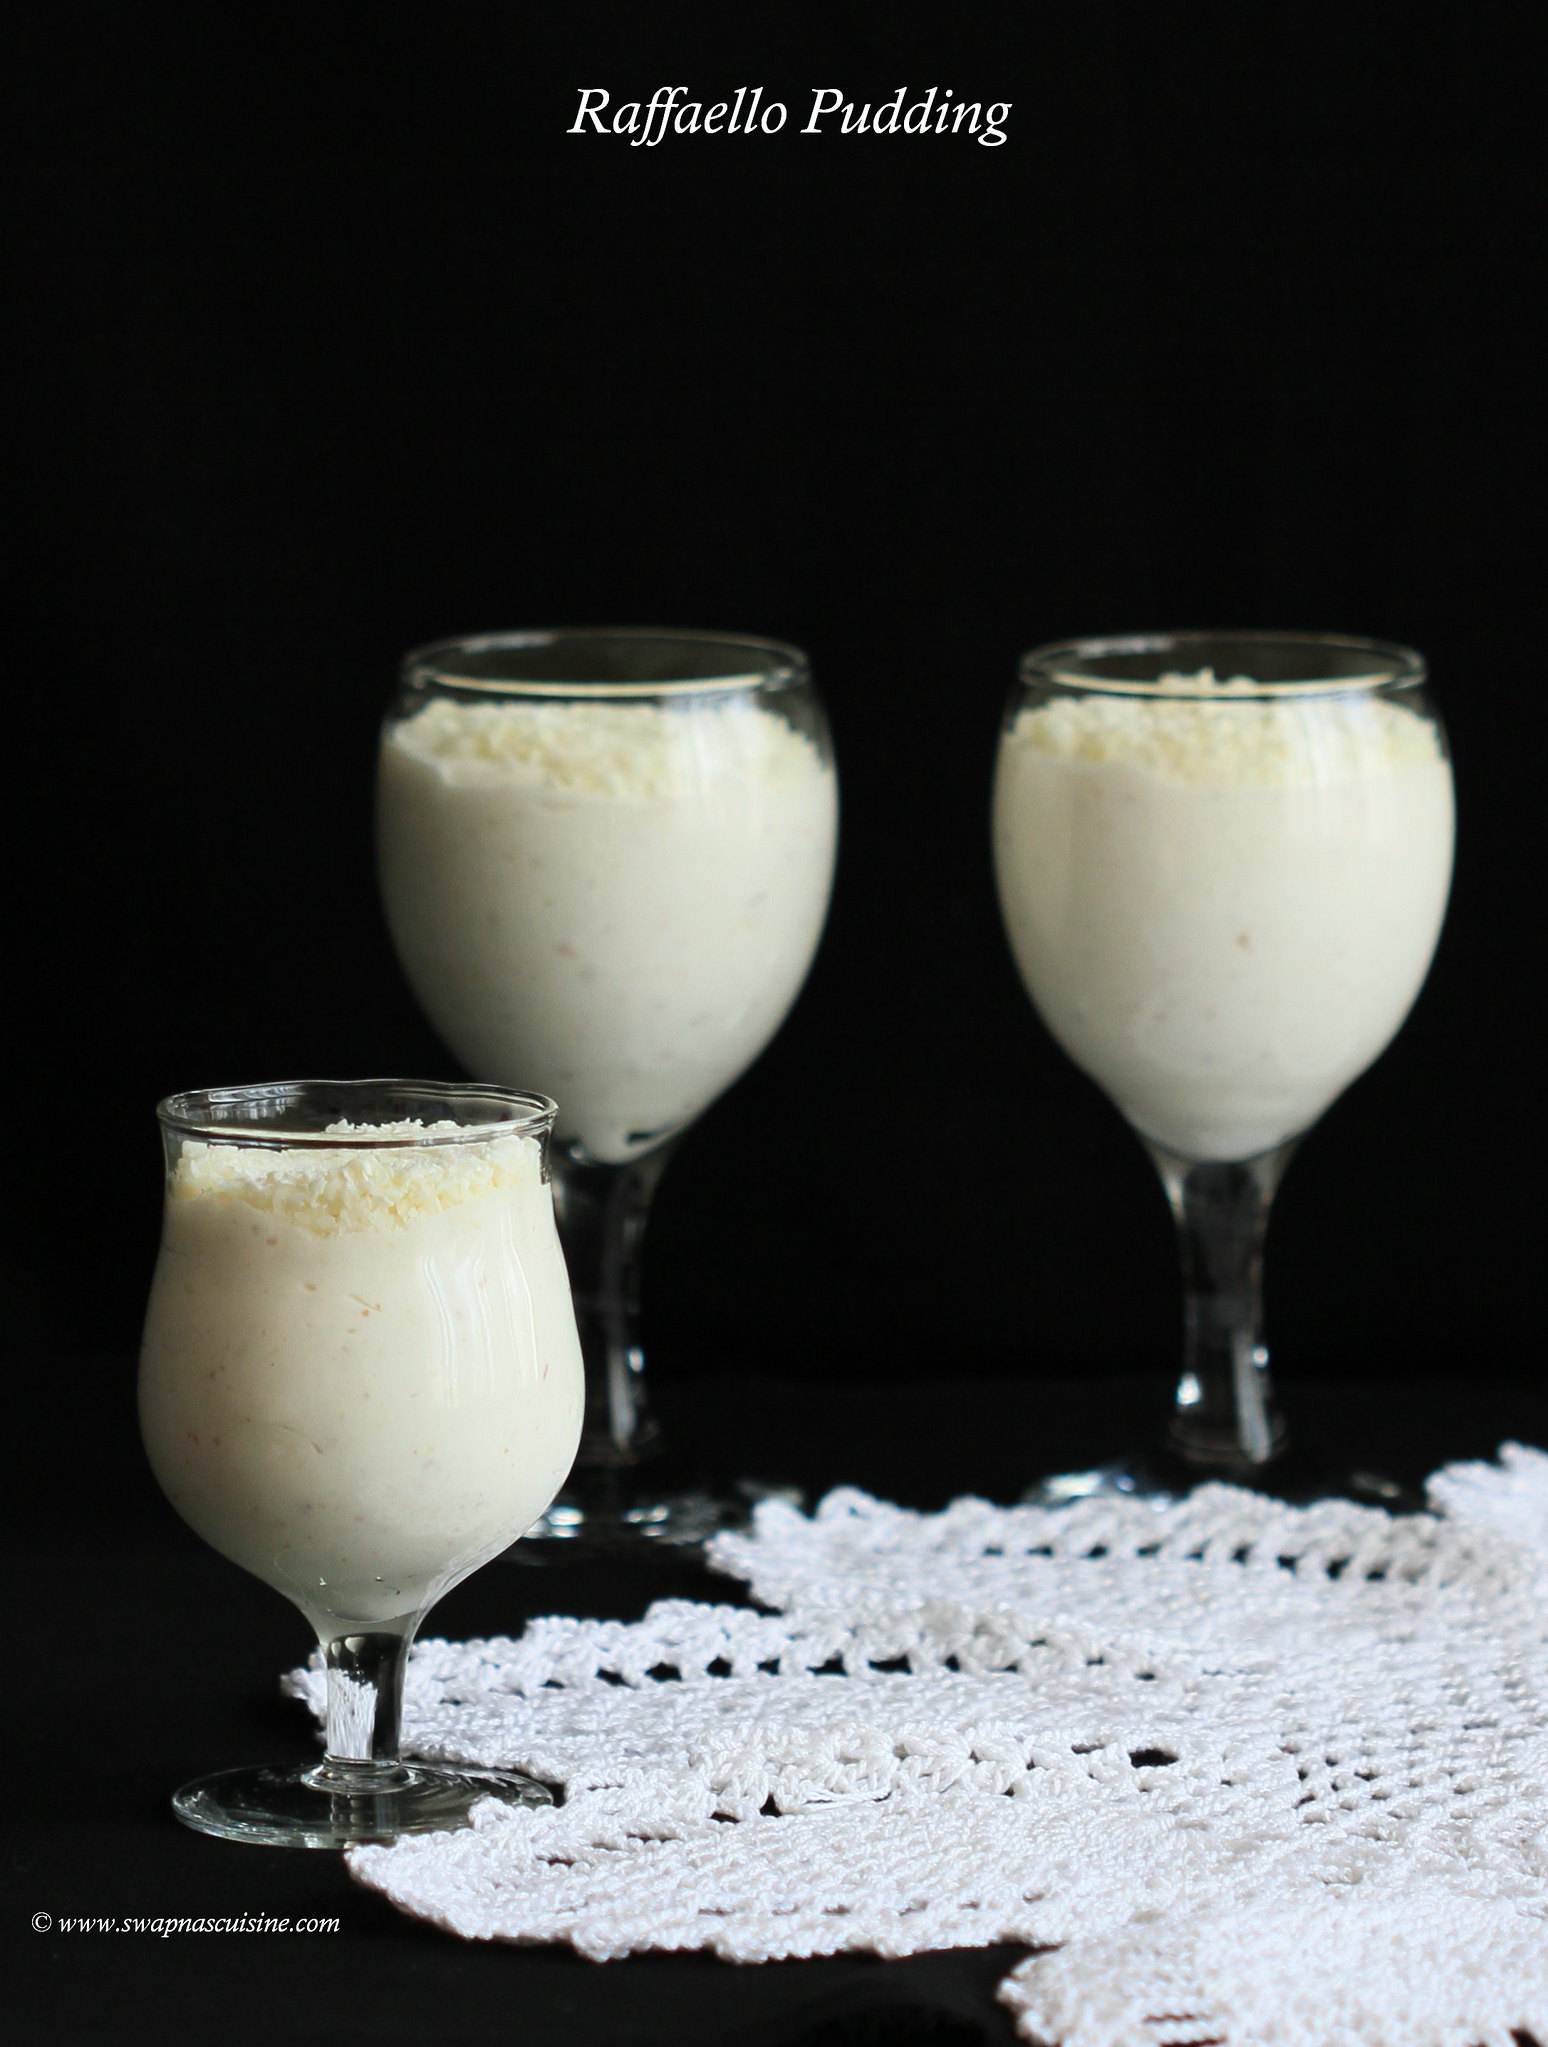
Raffaello Pudding


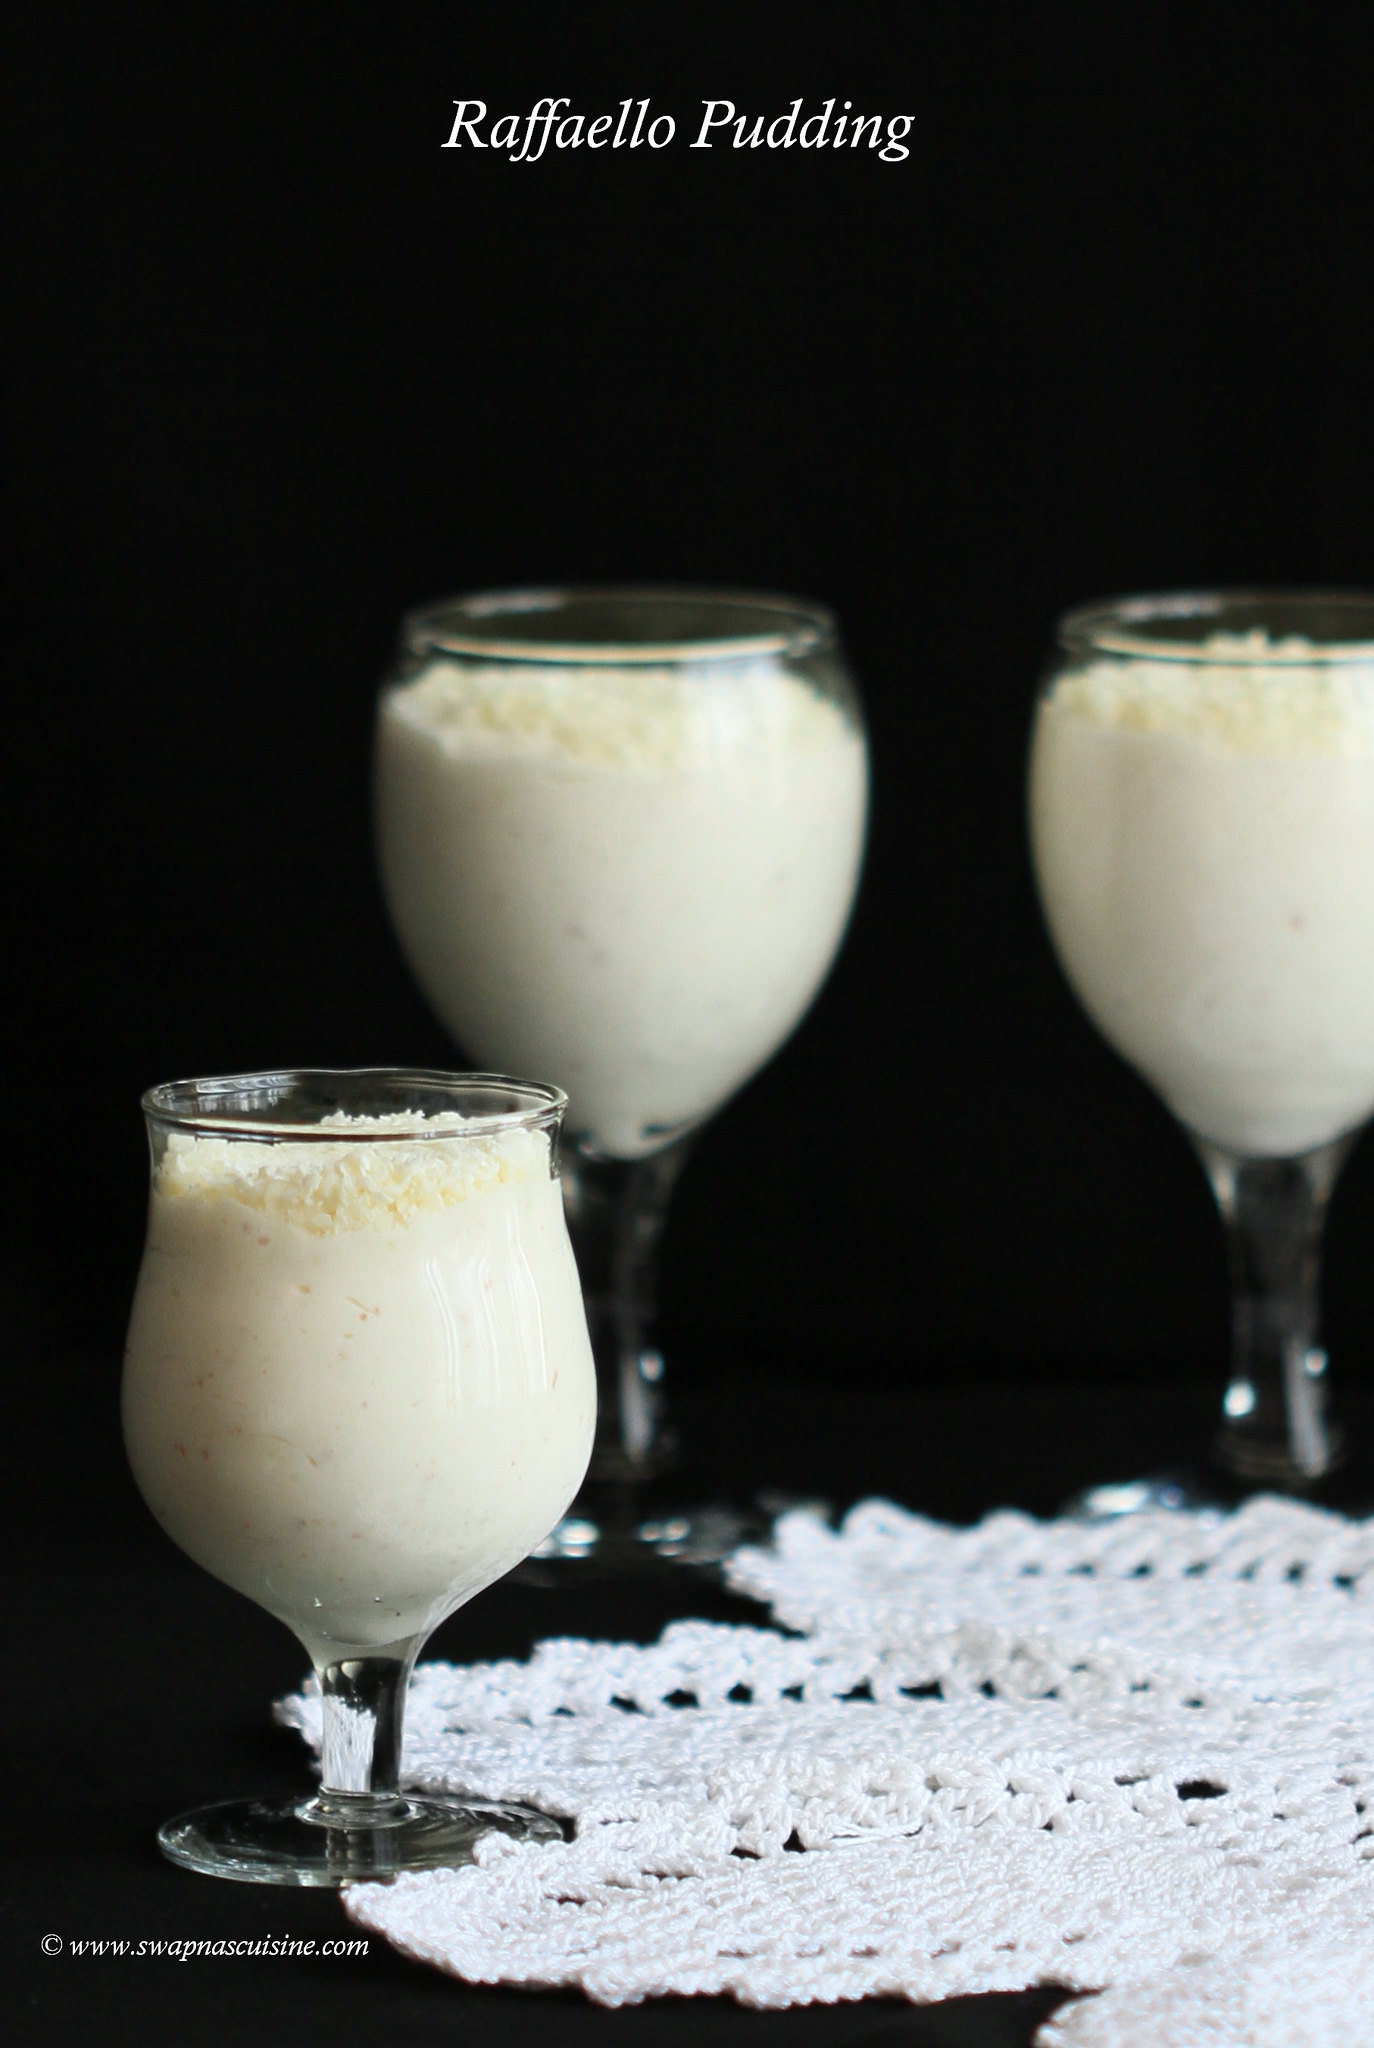
Raffaello Pudding is a wonderful combination of coconut, cream, condensed milk and white chocolate which resembles the taste of the Ferrero Rocher Raffaello Truffles. This is a very rich pudding with a beautiful texture and flavour. No cooking or baking is involved in the making of this pudding, you just need to whip everything and refrigerate to set. Make sure to use desiccated coconut, do not use fresh coconut to make this pudding. I only made half the quantity of the pudding and set in individual serving glasses. If you are setting the pudding as individual servings, as in the picture, you only need to add half table spoon of gelatine.


Raffaello Pudding
(Recipe from Lekshmi Nair)
(20-25 servings)
Ingredients:
Coconut Milk Powder – 200 gm
Fresh Cream – 400 ml (1 ¾ cups)
Whipping Cream – 250 ml (1 cup)
Condensed Milk – 1 tin
Desiccated Coconut – 1 cup
Gelatine – 1 tbsp. (use only half tbsp if setting in individual glasses)
Cold Water – ¼ cup
White Chocolate, grated – 1 ½ cups
Almonds / Badam – ½ cup, grated or finely chopped

Method:
  • Sprinkle gelatine over cold water and let stand for 5-10 minutes.
  • In a mixing bowl whip together coconut milk powder, condensed milk, whipping cream and fresh cream until soft peaks are formed.
  • Melt gelatine, either in microwave for 10 seconds or heat gently stirring well.
  • Pour the melted gelatine to the above pudding mix and whip well until everything is blended.
  • In a small bowl mix together desiccated coconut, grated almonds and 1 cup of grated white chocolate and combine well. Add this mix to the whipped pudding mixture and beat again until everything combined well.
  • Transfer the mix to a pudding dish or individual serving bowls. Decorate with remaining grated white chocolate and allow to set in fridge for 5-6 hours.
  • Serve chilled.


Read More » Print Friendly and PDF

Monday, 27 June 2016

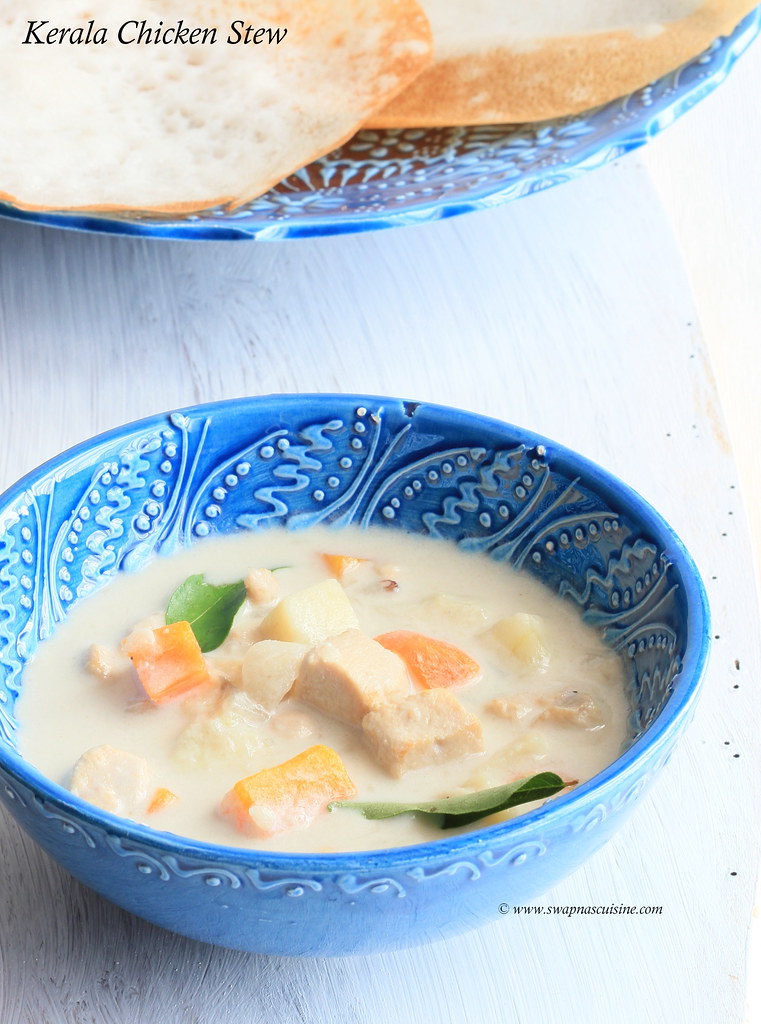
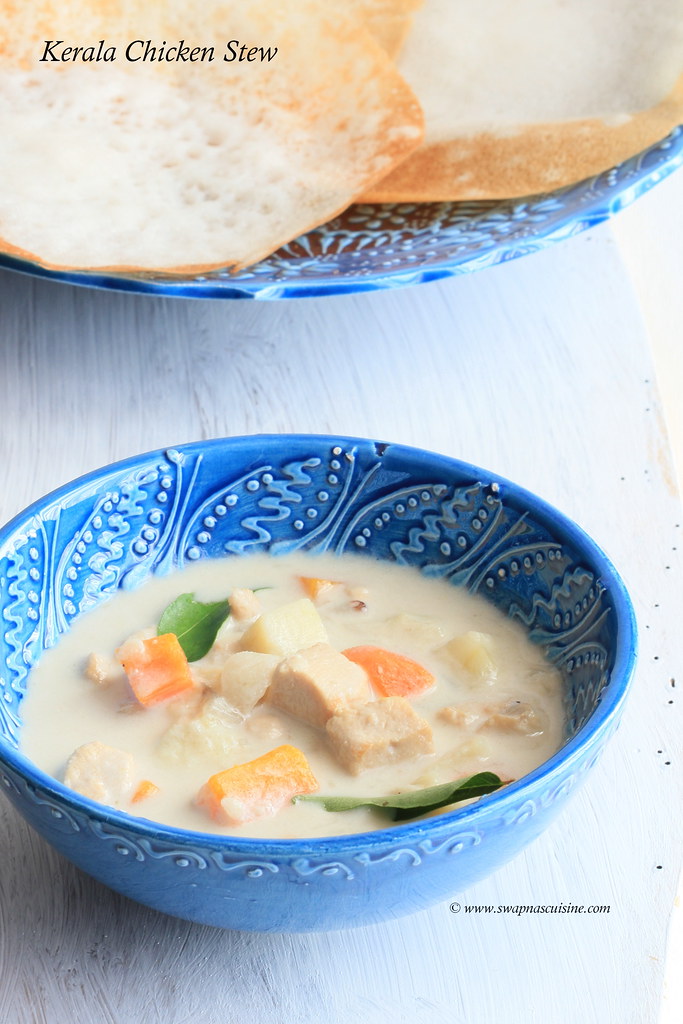
Kerala Chicken Stew Recipe / Kozhi Stew

How to make Kerala Chicken Ishtew

Stew or Ishtew is a mildly spicy and creamy Kerala special delicacy which goes very well with appam,bread, puttu, chapathi etc. In most Kerala Christian families, Christmas or Easter breakfast is incomplete without appam and chicken or mutton stew. Stew has to be white in colour and you have to make sure not to brown the onion while sautéing. Cashew nut paste will enhance the flavor and make the gravy thick and creamy.

Kerala Chicken Stew Recipe / Kozhi Stew
Ingredients: 
Chicken - ½ kg (cut in to medium pieces, I used boneless chicken)
Potato - 1 small, cubed
Carrot - 1 small, cubed
Onion - 1, thinly sliced
Green chillies - 4, slit
Ginger - 1 tsp, finely chopped
Garlic - 1 tsp, finely chopped
Cinnamon sticks - 1 inch x2 pieces
Cardamom - 4
Cloves - 4
Black peppercorns - 1 tsp
Medium thick coconut milk - 3 cups
Thick coconut milk - 1 cup
Cashew nuts - 6 - 8 ground to a fine paste
Curry leaves - few
Salt - to taste
Coconut oil - 2 tbsp


Method:
  • Heat oil in a pan and add cinnamon sticks, cardamom, cloves, black peppercorns and sauté. Add onion, ginger, garlic and green chillies and curry leaves and stir fry until they becomes soft and translucent. (make sure not to brown the onion).
  • Add chicken pieces and stir fry for 2-3 minutes until the meat is lightly seared.
  • Add cubed potatoes and carrots, medium think coconut milk and salt, and cook for 15-20 minutes over medium heat until the chicken, carrot and potatoes are fully cooked.
  • Add cashew nut paste, thick coconut milk and vinegar, mix well and simmer for 2 minutes or until you get the required thickness.
  • Serve hot with palappam, vellayappam, Idiyappam, Puttu, Chapathi or bread.
How to make Kerala Chicken Stew

Read More » Print Friendly and PDF

Monday, 13 June 2016

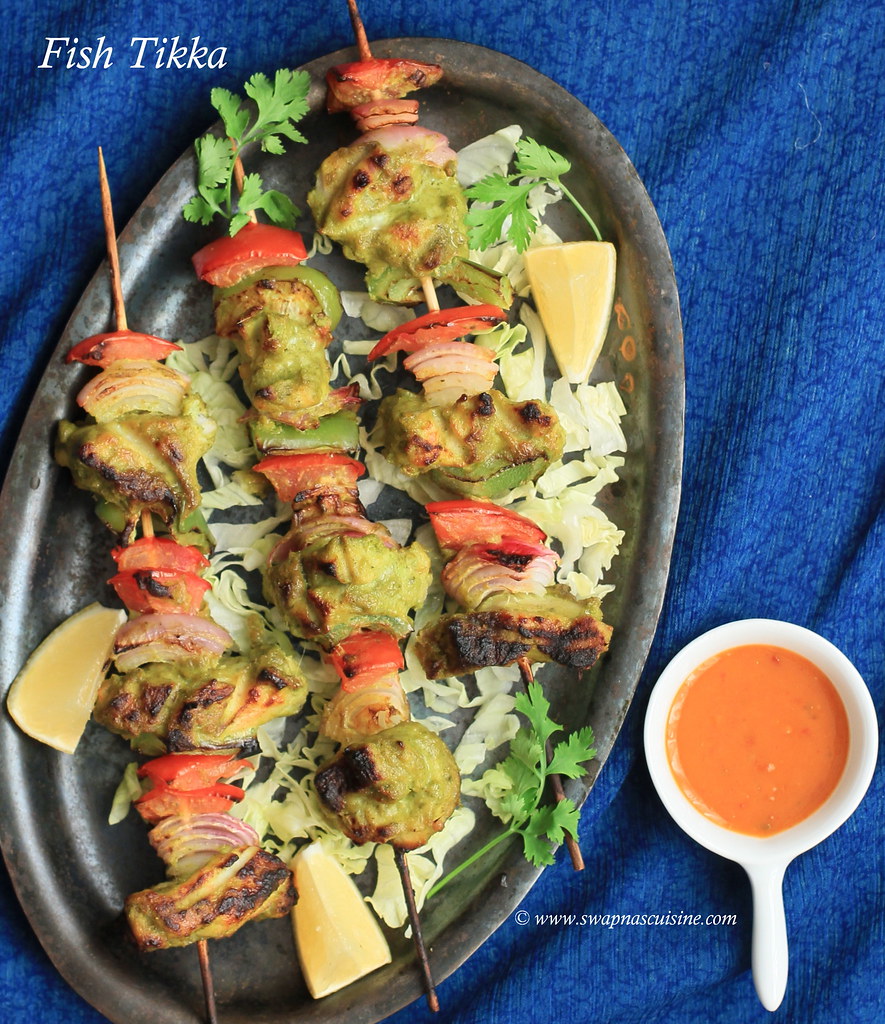
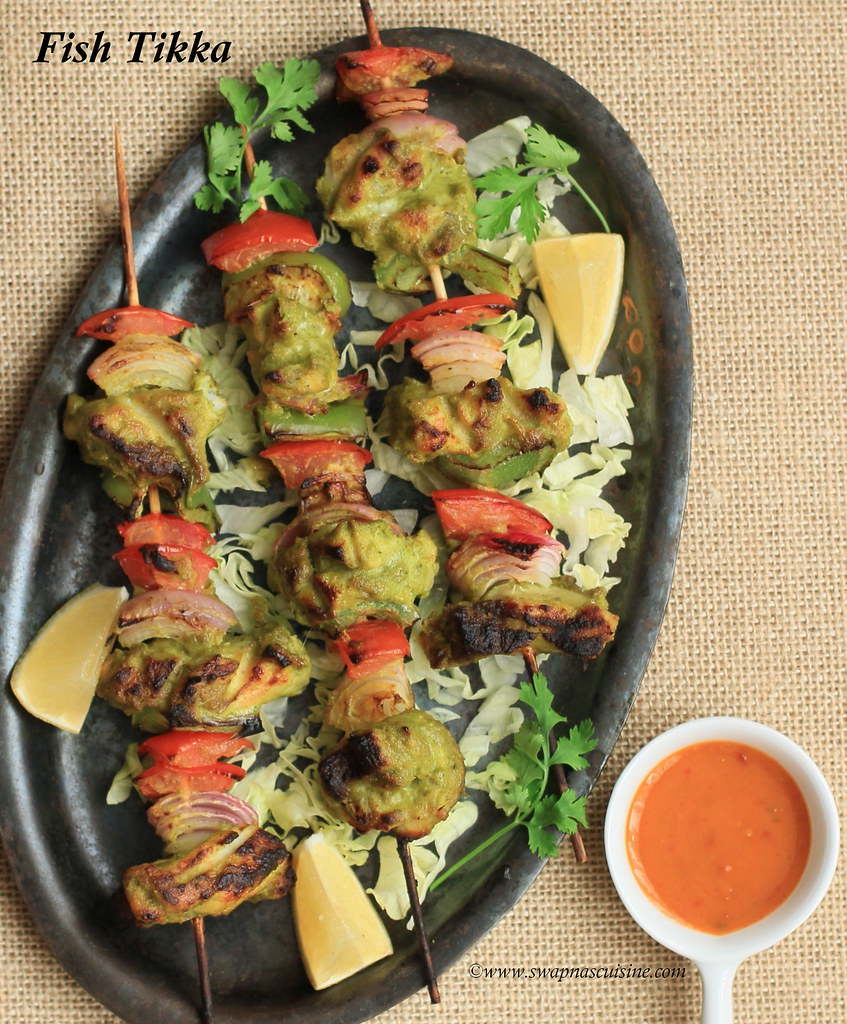
Fish Tikka

How to make Tikka on stove top

Tried this recipe after seeing a popular cookery show, Annie’s Kitchen.  It came out really well so thought of sharing it with you. You can either grill or bake tikkas in the oven, use an electric toaster grill or on stove top. It’s a very easy and hassle free recipe. You can marinate the fish pieces and keep it overnight in the fridge before grilling. It is a perfect recipe to serve as a starter or as a main or side dish. A great addition to a party menu :) :) ...

Homemade fish tikka recipe

Fish Tikka

Ingredients:
Boneless Fish - 1kg {can use Neymeen (Seer fish),  Motha (King fish) or any thick boneless fish pieces}
Onion -1 cup, cut into 1 ½“pieces
Tomato -1 cup, cut into 1 ½“pieces (remove seeds)
Capscium – 1 cup, cut into 1 ½“pieces
Butter – 3 tbsp

For the marinade:
Ginger paste - 2 tsp
Garlic paste – 2 tsp
Green chilly paste- 4 tsp
Mint leaves paste – 2 tsp
Ajwain powdered / Ayamodakam podi -1 tsp
Turmeric powder – ½ tsp
Dried fenugreek leaves / Kasoori methi- ½ tsp
Lightly roasted Besan/ chickpea flour/ kadala maavu - 2 tsp
Hung Curd (yogurt) - 4 tsp
Vegetable oil – 1 tbsp
Lemon juice -2 tbsp
Salt to taste

Method:
  • Cut into 1 ½ inch pieces and rub the fish with little salt and vinegar to remove the fishy odour. Keep aside for 5 minutes. Wash well and pat dry on a kitchen towel.
  • Mix all the marinade ingredients in a big bowl and add fish pieces and mix well to coat all the marinade to the fish pieces. Keep aside for half hour. (you can keep this marinated fish overnight in the fridge).
  • Just before grilling, add onion, capsicum and tomato pieces to the marinated fish and well.
  • Skewer the fish and vegetables alternately on skewers or tooth picks.
  • If you are using an oven, place the skewered tikkas on the wire rack. Brush tikkas with melted butter and grill for 10-15 minutes overturning them every few minutes.
  • If you are using stove top, melt little butter in a non-stick tava, add skewered fish tikkas and grill on medium flame until all sides are lightly browned and fish is cooked well.
  • Serve hot decorated with lemon wedges and pudina chutney or sauce.
Mahi Tikka

Read More » Print Friendly and PDF

Monday, 23 May 2016

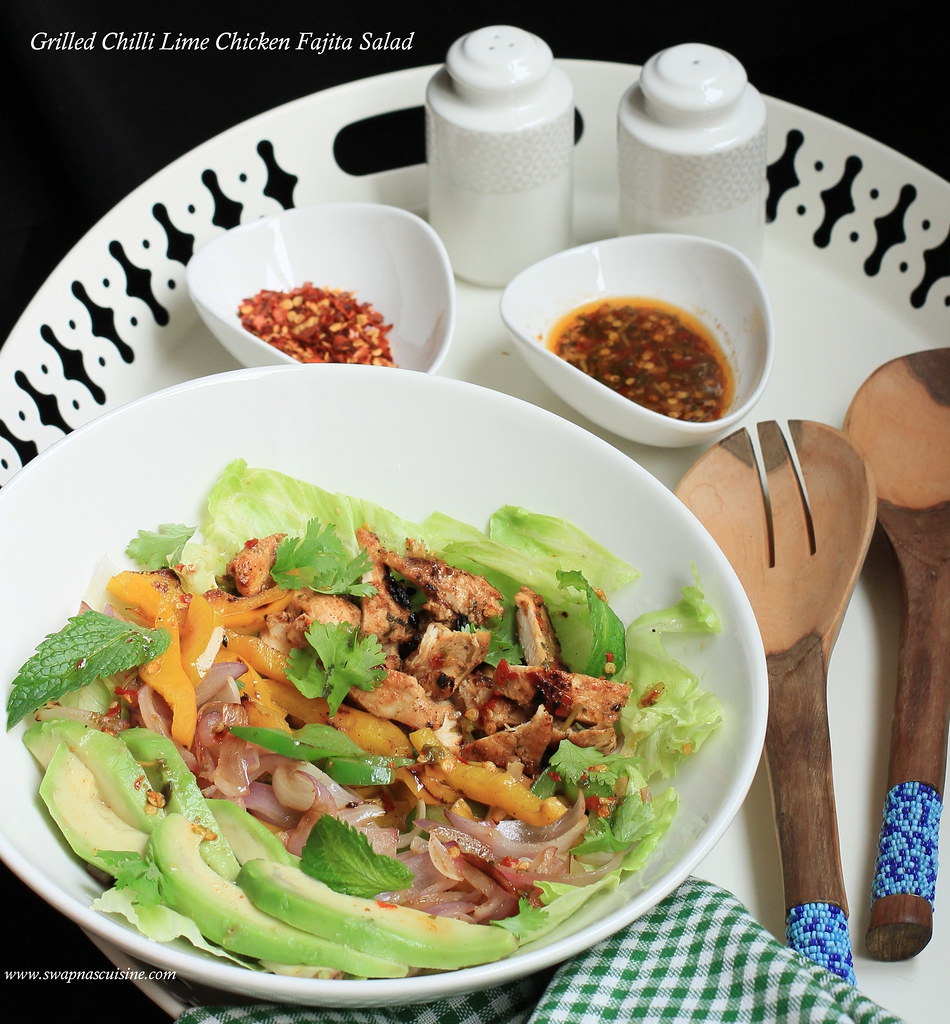
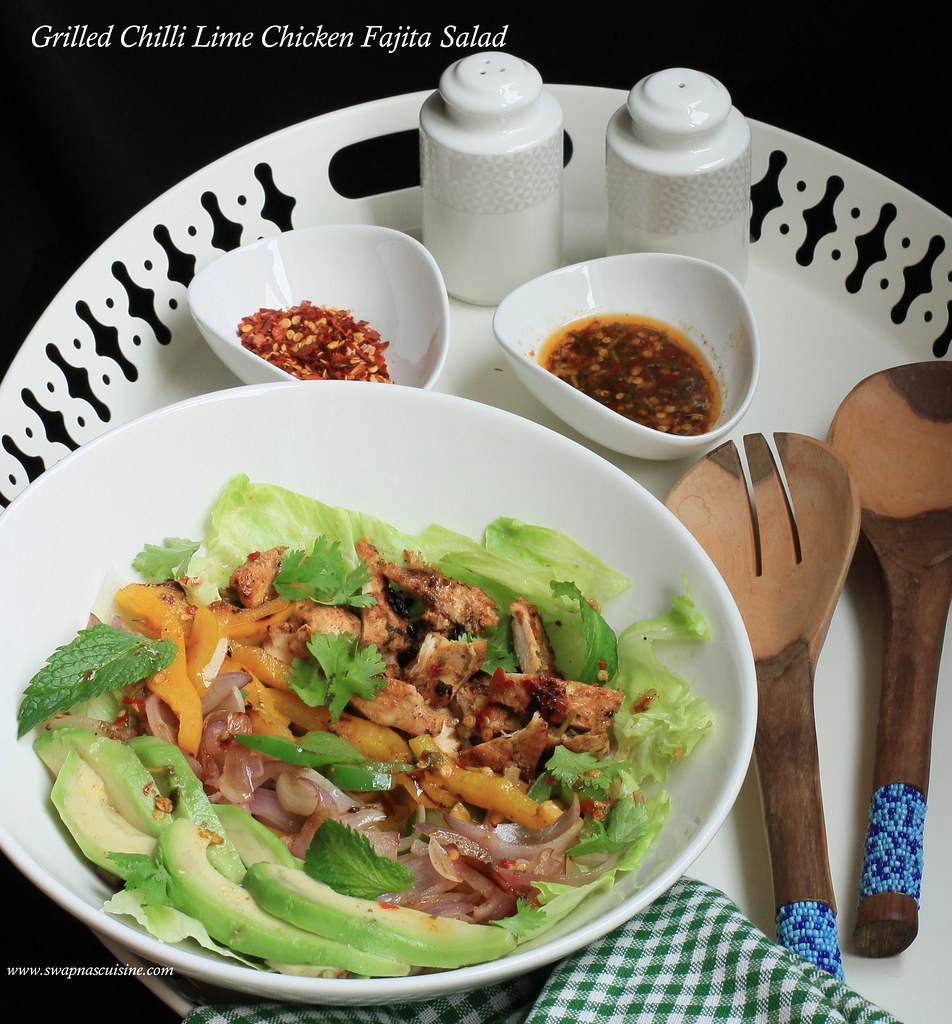
Grilled Chilli Lime Chicken Fajita Salad

Chicken Fajita Salad,

This salad caught my eye when I first saw the picture on the net. Tender and juicy chicken grilled in a chilli lime marinade and served with avocado slices, grilled capsicum, onion and lettuce. The best part of this recipe is that the marinade is also used as a dressing. Just make the marinade and use half of it to marinate chicken and other half can be kept in the fridge to use as dressing. We really loved this flavourful salad and is a great addition to a party menu :) 

Grilled Chilli Lime Chicken Fajita Salad
(Recipe from here)
Ingredients:
Marinade/Dressing:
3 tablespoons olive oil
100ml (just over ⅓ cup) freshly squeezed lime juice
2 tablespoons fresh chopped coriander leaves
2 cloves garlic, crushed
1 teaspoon brown sugar
1 teaspoon red chilli flakes 
½ teaspoon ground Cumin
1 teaspoon salt
Salad:
4 boneless chicken
½ yellow bell pepper, deseeded and sliced
½ red bell pepper, deseeded and sliced
½ an onion, sliced
5 cups lettuce leaves, washed and dried
2 avocados, sliced
Extra coriander leaves to garnish
Sour cream (optional) to serve
Method:
  • Whisk marinade ingredients together to combine. Pour half the marinade into a shallow dish to marinade the chicken fillets for two hours if time allows. Refrigerate the reserved untouched marinade to use as a dressing.
  • Heat about one teaspoon of oil in a grill pan or skillet over medium-high heat and grill chicken fillets on each side until golden, crispy and cooked through. (Grill in batches to prevent excess water being released.) Once chicken is cooked, set aside and allow to rest.
  • Wipe pan over with paper towel; drizzle with another teaspoon of oil and fry pepper and onion strips until cooked to your liking.
  • Slice chicken into strips and prepare salad with leaves, avocado slices, peppers, onion strips and chicken. Drizzle with remaining marinade/dressing and serve with extra coriander leaves and sour cream.

Salad Recipes,

Read More » Print Friendly and PDF

Wednesday, 7 January 2015

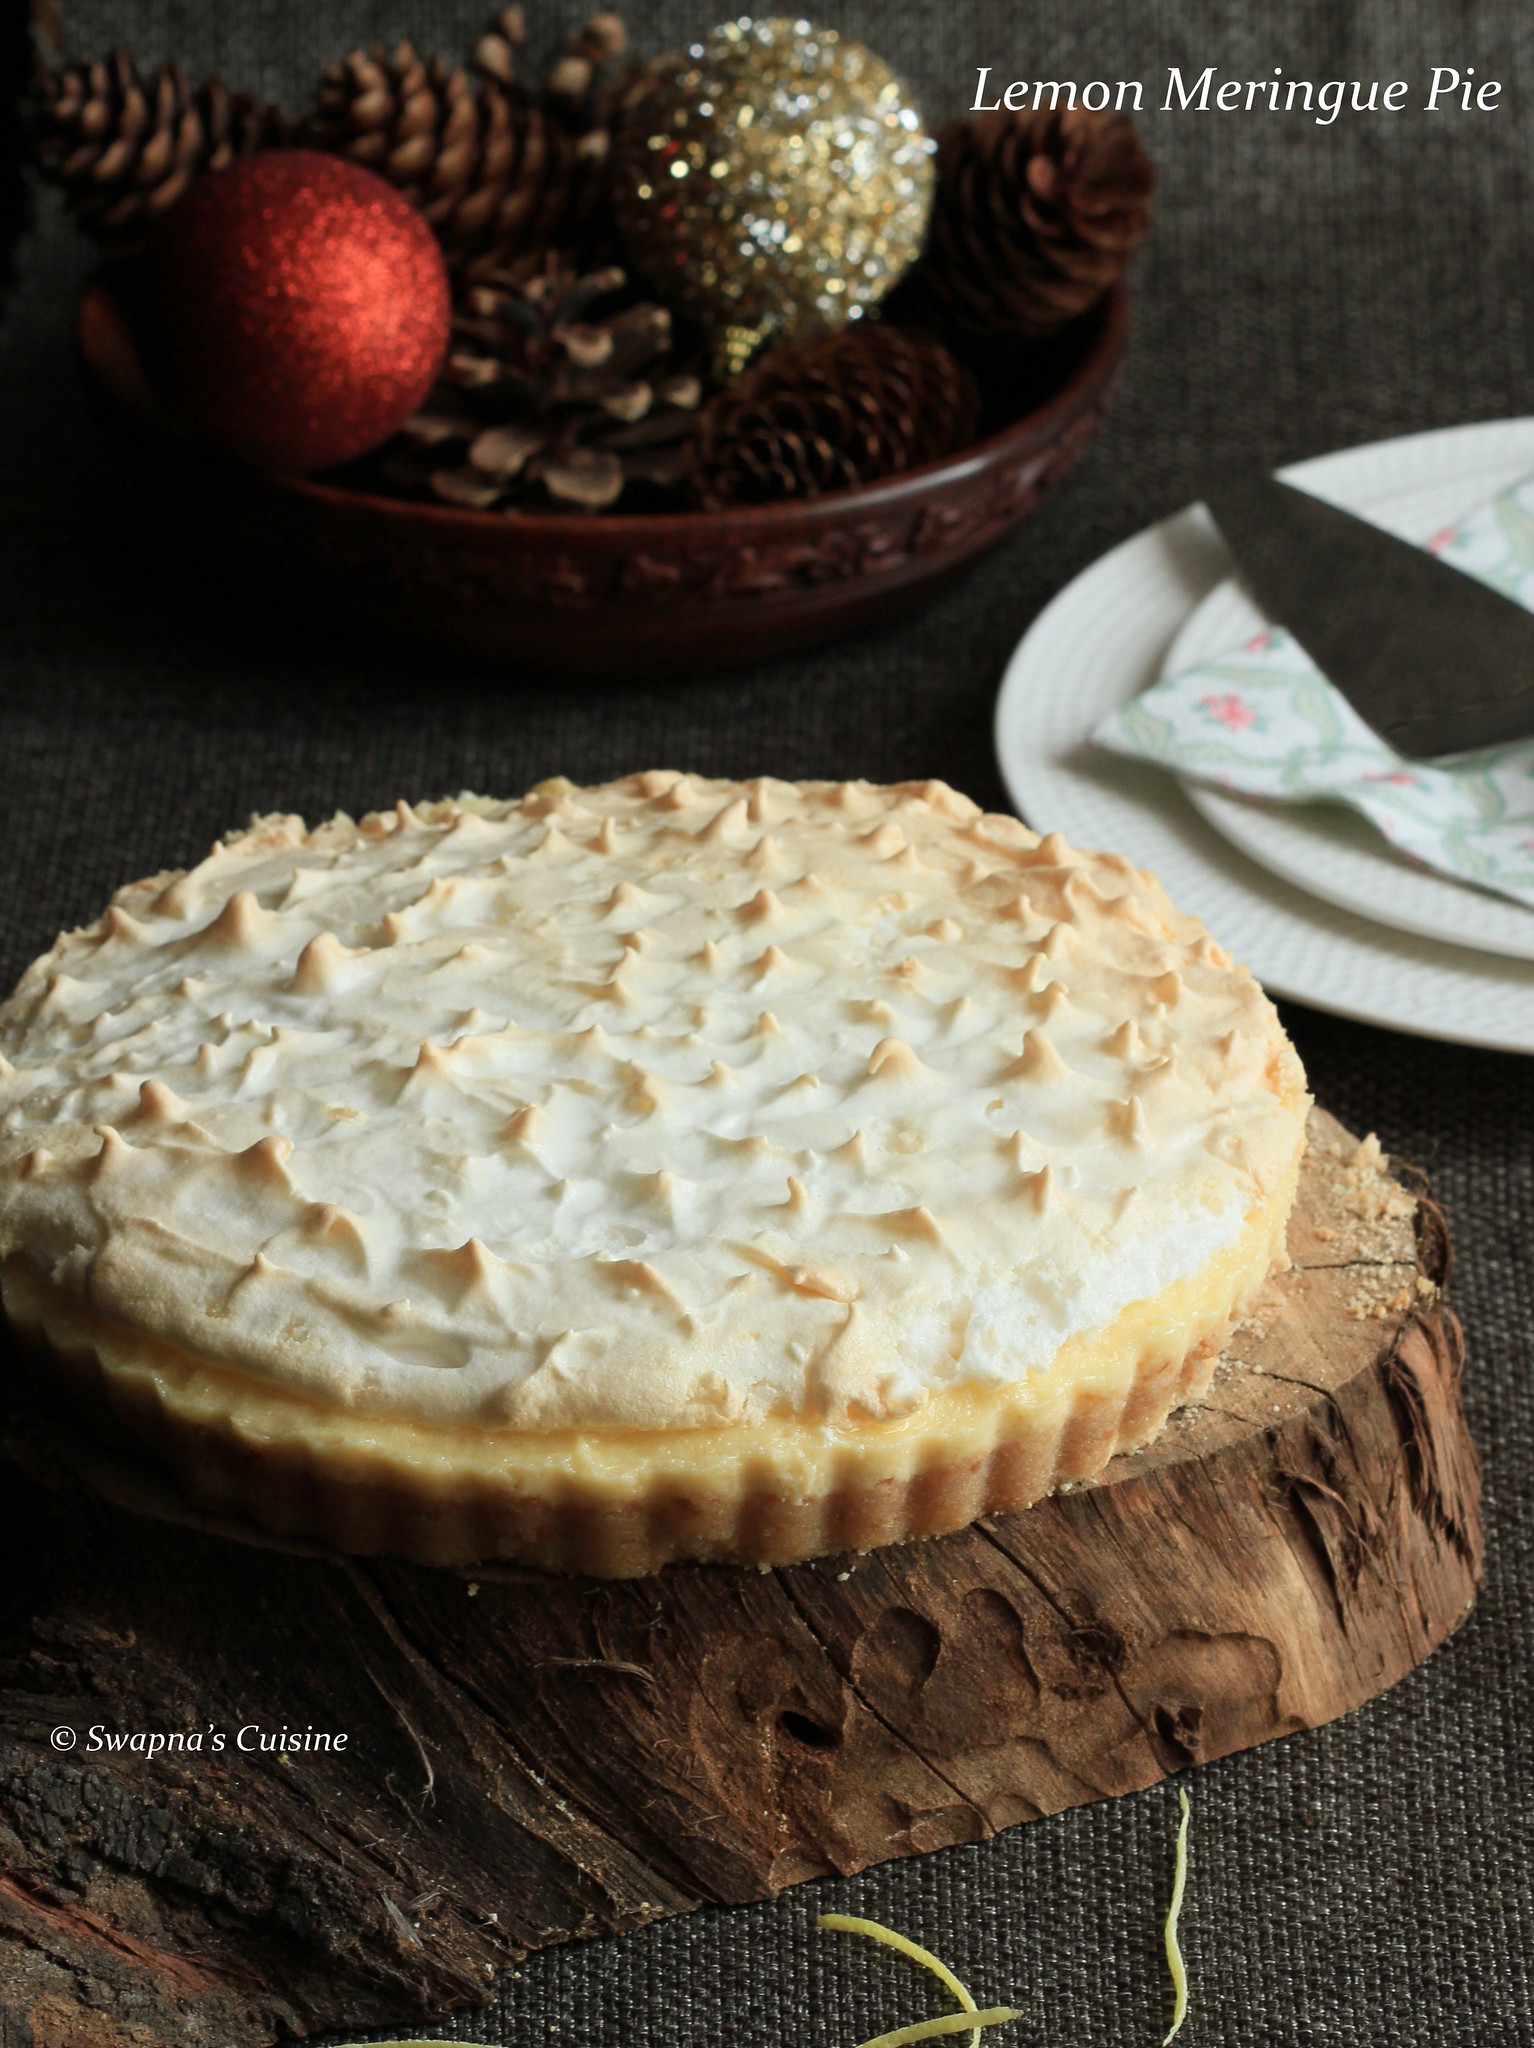
Lemon Meringue Pie


Lemon Meringue Pie Recipe

I am re-posting one of the recipes from my initial days of blogging. This was our 2015 New Year day dessert and I thought of changing the old pictures with new ones. This Lemon Meringue Pie is a very easy to make delicious dessert with easily available ingredients... A perfect dessert to include in a party menu!
Read More » Print Friendly and PDF

Thursday, 1 January 2015

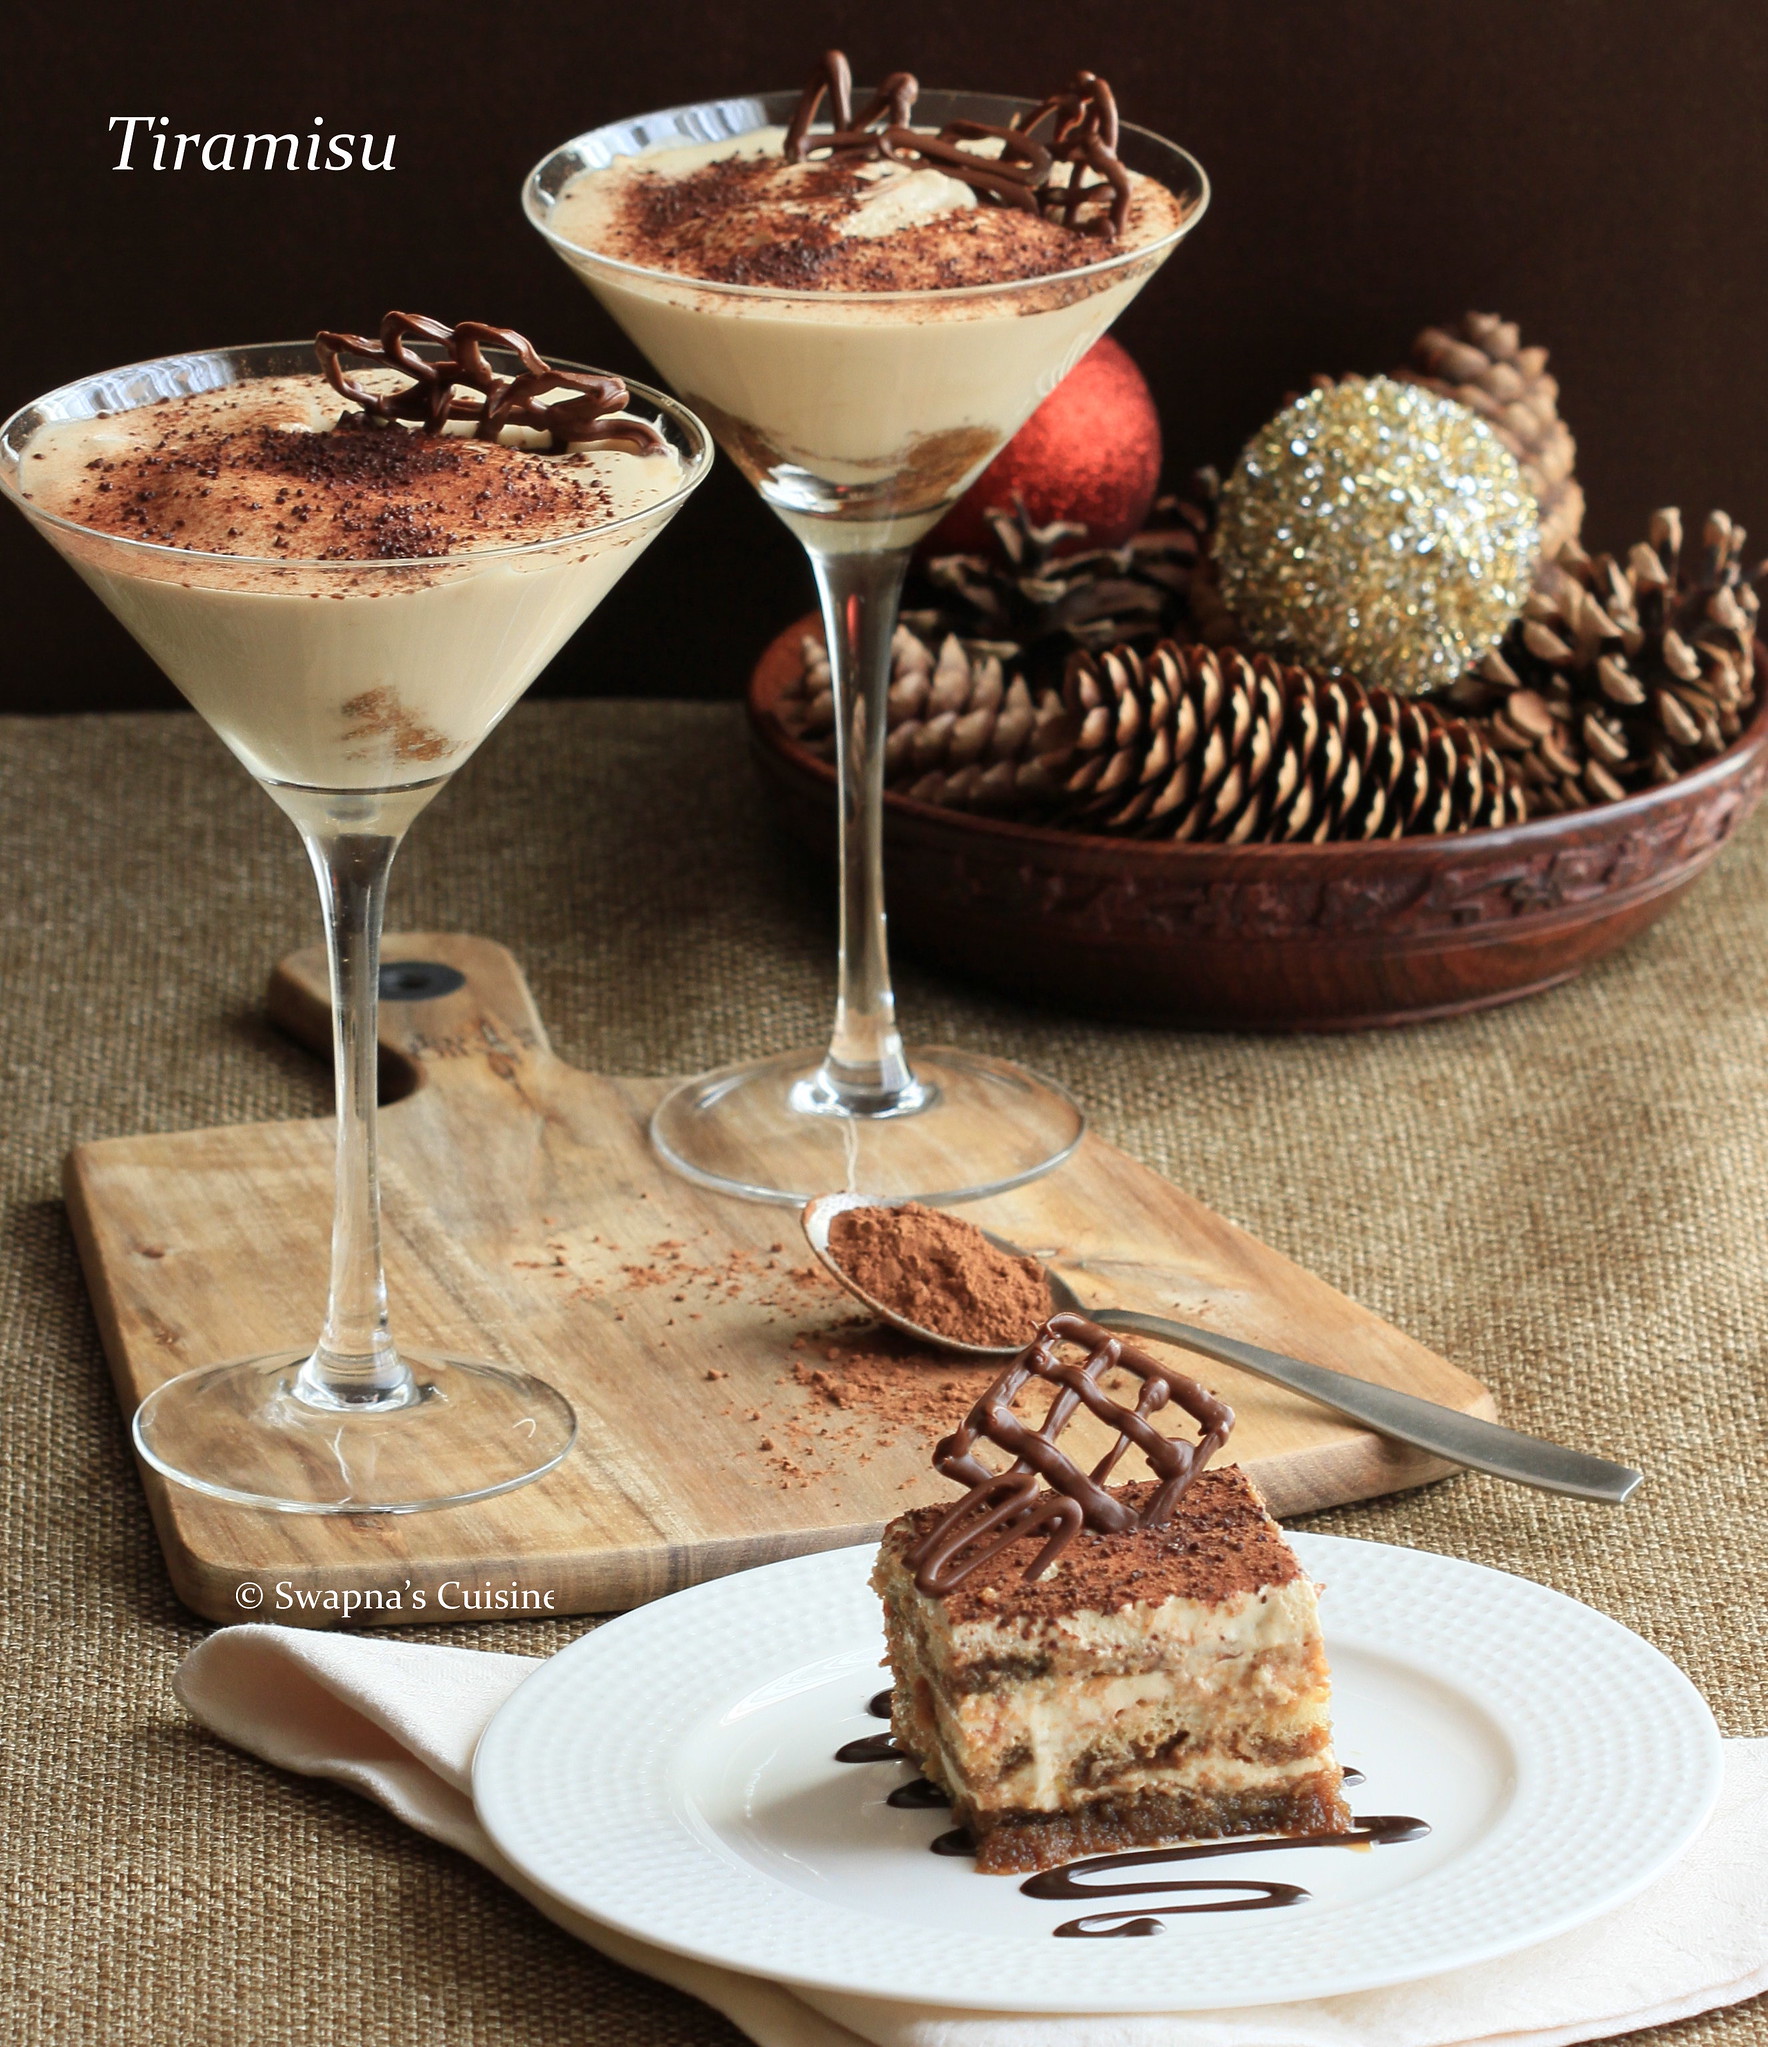
Tiramisu ~ Heaven on a Dessert Plate!

Tiramisu

I always wanted to make Tiramisu, but here in Kuwait we rarely get Mascarpone cheese and it is inevitably always highly priced. When I found the recipe for homemade mascarpone cheese on Vera’s blog I really wanted to make the mascarpone and Tiramisu at home, and so began the search for the perfect Tiramisu recipe. And in February when the Daring Bakers Challenge hosted by Deeba and Aparna was announced, I saw the entire blog sphere was filled with Tiramisu recipes. I knew I could trust Deeba’s recipe blindly as I had already tried several of her other recipes earlier and they were all really good. So when my brother visited last week I made Tiramisu for him and we all really liked it. So here is the Tiramisu recipe I tried from Deeba’s place.
Read More » Print Friendly and PDF

Monday, 10 February 2014

Chocolate Orange Fudge Recipe

How to make Chocolate Orange Fudge

Valentine’s Day is around the corner, shops are filled with roses, chocolates, teddies etc... Like every year I thought I will update this space with some recipes that are apt for the season... This Chocolate Orange fudge is super easy to make and it will be a big hit with kids and grownups... This is a great option as a gift on Valentine’s Day, Christmas or even when visiting friends or relatives....  The nuts in the recipe is optional and if you don’t like nuts you can completely omit it or reduce it to ¼ cups... I only added ¼ cups of cashew nuts...  Try this Chocolate Orange Fudge at home....
Read More » Print Friendly and PDF

Friday, 22 November 2013

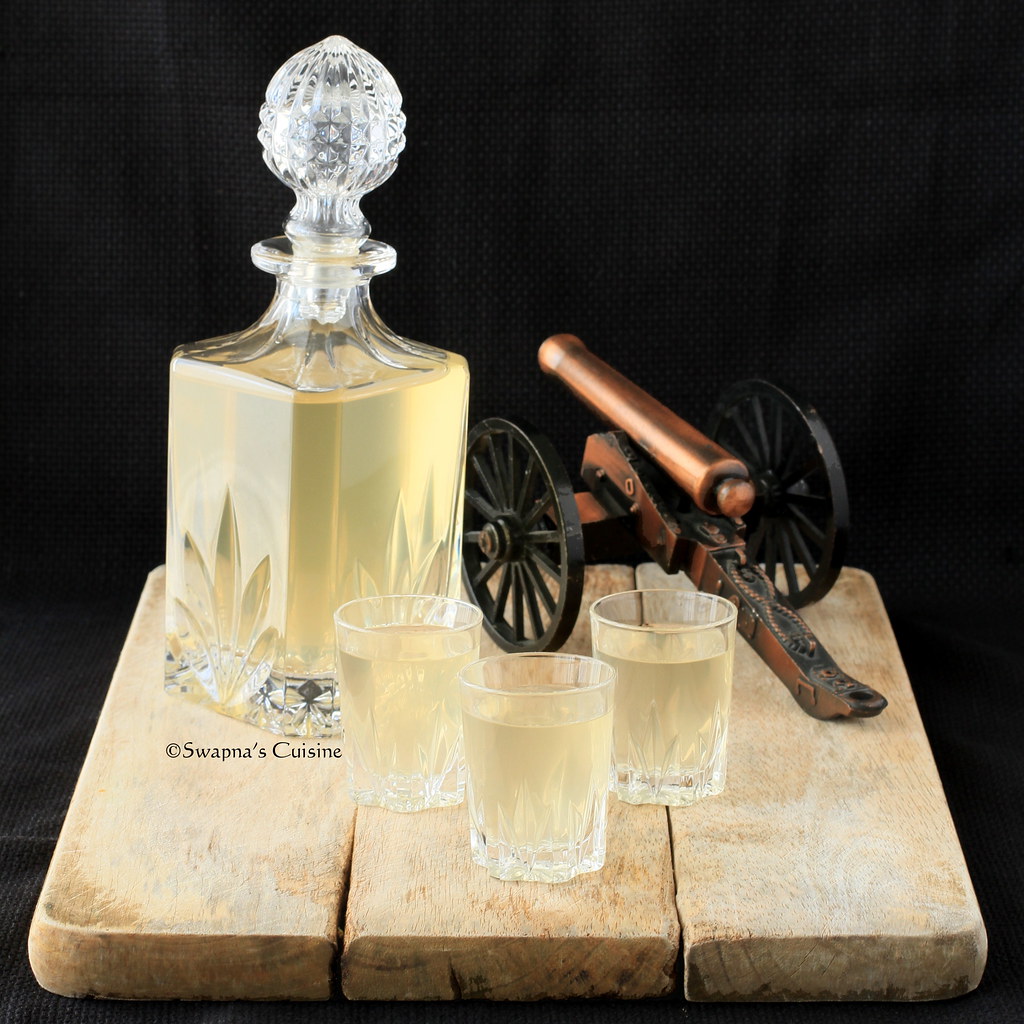
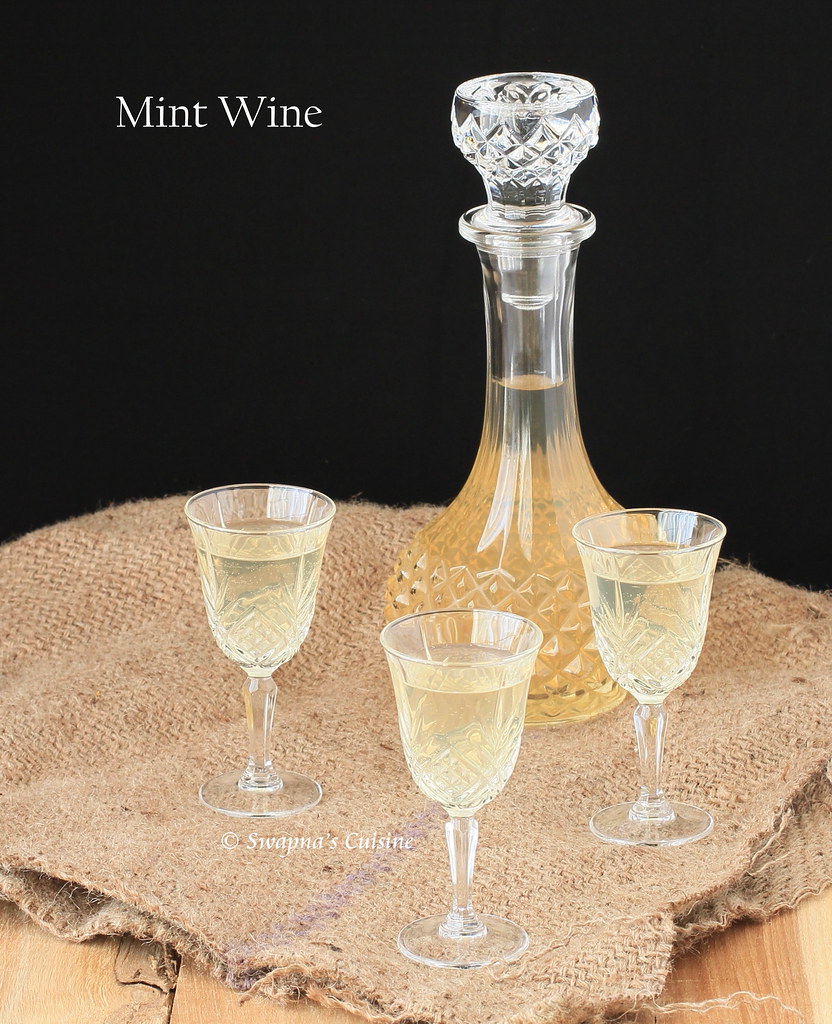
Homemade Mint Wine Recipe

Kerala Mint Wine Recipe

Christmas is around the corner and many of you may have already started your Christmaspreparations..... I know some of you have already made wines and soaked fruits for your cake as I have been getting several emails with doubts regarding the same.... I am trying my best to reply to all of you.... But I have a small request.... please read the recipe thoroughly as most of your queries are already answered in my recipe. For e.g. I have clearly mentioned in every recipe how many days you have to stir the wine and how many days to keep the wine.... so please don’t send me questions that are already answered.... Also do check the post “Tips for making Homemade Wines as this will help tremendously.... Thanks for understanding :)....If in case you are looking for a nice Christmas Cake recipe here is the link....

I made this Mint wine last April. It’s a really sweet dessert wine with a subtle mint taste....  Even though you can consume it after 30 days, the wine looks little cloudy. I got this very clear wine after keeping it for almost 6 months. So I suggest you allow this wine to age for approximately 6 months after which you will get a mild mint flavored clear wine.
Read More » Print Friendly and PDF

Monday, 15 April 2013

Arabic Stuffed Zucchini in Tomato Sauce / Kousa Mihshi Recipe


Arabic Stuffed Zucchini Recipe

Kousa Mihshi (Stuffed Zucchini) is an Arabic main dish and widely popular in this region. Minced beef / lamb is mixed with raw rice and spices and then stuffed inside the cored Kousa / koosa (marrow squash / Arabic zucchini) and cooked in tomato paste. I used minced chicken instead of red meat.... I got the basic recipe from my maid and then I searched on the net and made this dish to suit our taste buds.... While searching the net I remember reading on one site that you can make a vegetarian version of this dish by replacing the meat with chopped mushrooms, I never tried it though.... If you like zucchini you will enjoy this mildly spiced dish. Serve as a main dish along with some nice salad.... 
Read More » Print Friendly and PDF

Sunday, 31 March 2013

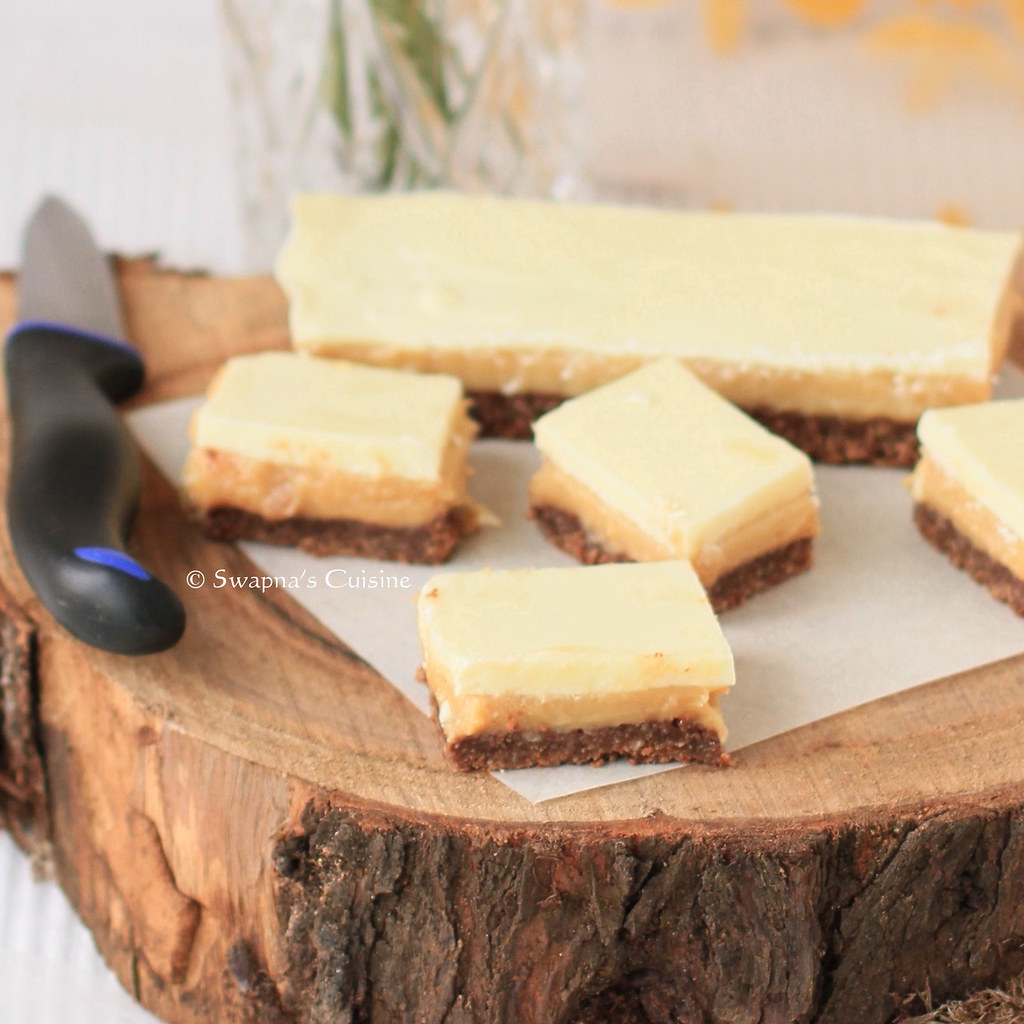
White Chocolate Caramel Slice

White Chocolate Caramel Slice


Hope all are ready for Easter celebrations.... Wishing all my readers a Blessed and Happy Easter! 
Today I am sharing an absolutely decadent little indulgence of White chocolate caramel slices....Got this recipe from Australian Women’s weekly.....I had posted Banoffee Slice recipe from the same book earlier.....This too was really delicious and some of my guests who tried it really loved it..... The only problem for me was cutting the slices into neat pieces after setting as my white chocolate had become very hard.... I suggest using really good quality white chocolate for this....Do let me know if you try this recipe.... 
Read More » Print Friendly and PDF

Saturday, 16 March 2013

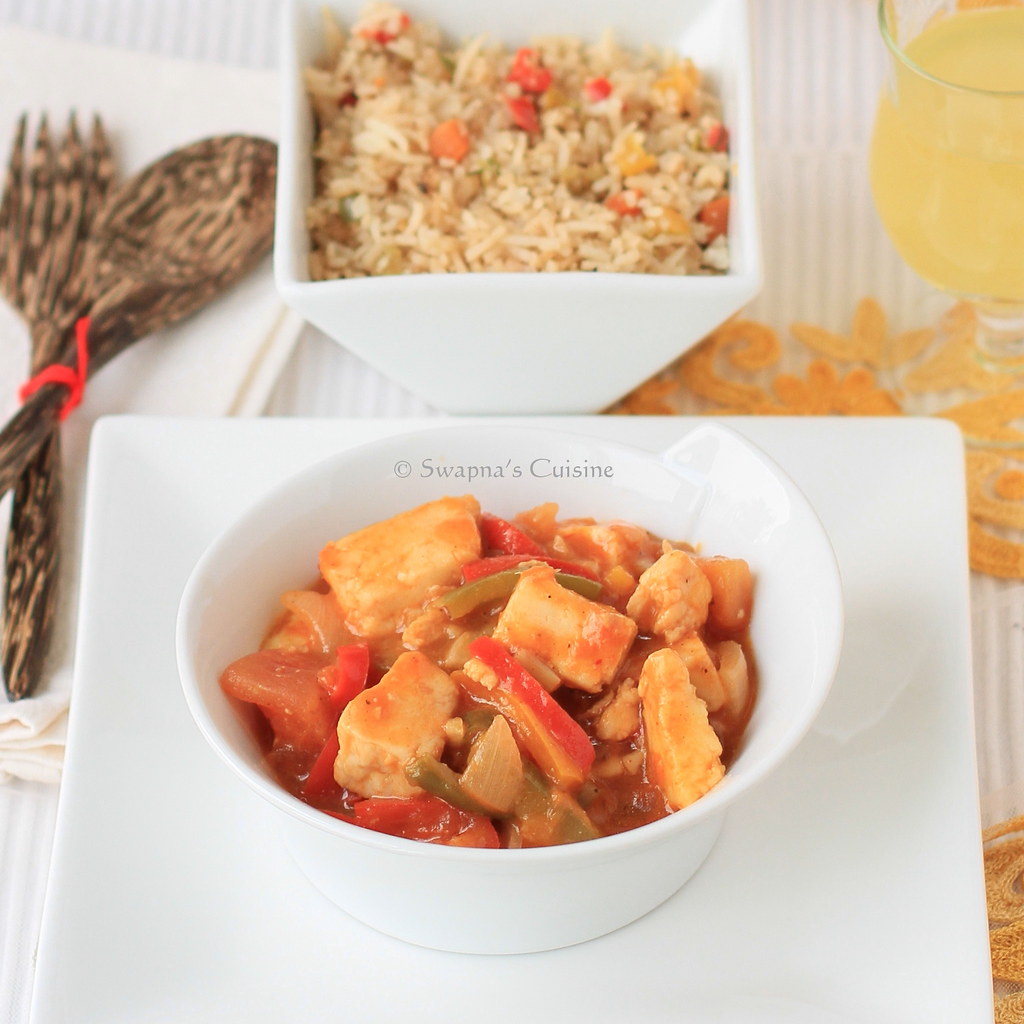
Saucy Paneer Recipe


Indian Paneer Recipe

Since it is the Lent Season vegetarian recipes are much in demand.... deciding the daily menu without any non-veg dish is challenging for a Christian family :D.... Since Paneer is loved by almost all I thought of sharing this Saucy Paneer recipe with you today.... with just a couple of sauces you can make this curry very quickly and it goes well with fried rice, noodles or even with chapathi.....  If you don’t have 8 to 8 sauce at home you can easily omit it or substitute with sweet and sour sauce like I do when I run out.... Instead of paneer you can also use Tofu for a vegan version..... Check out the other Paneer recipes I posted earlier too.....
Read More » Print Friendly and PDF

Wednesday, 27 February 2013

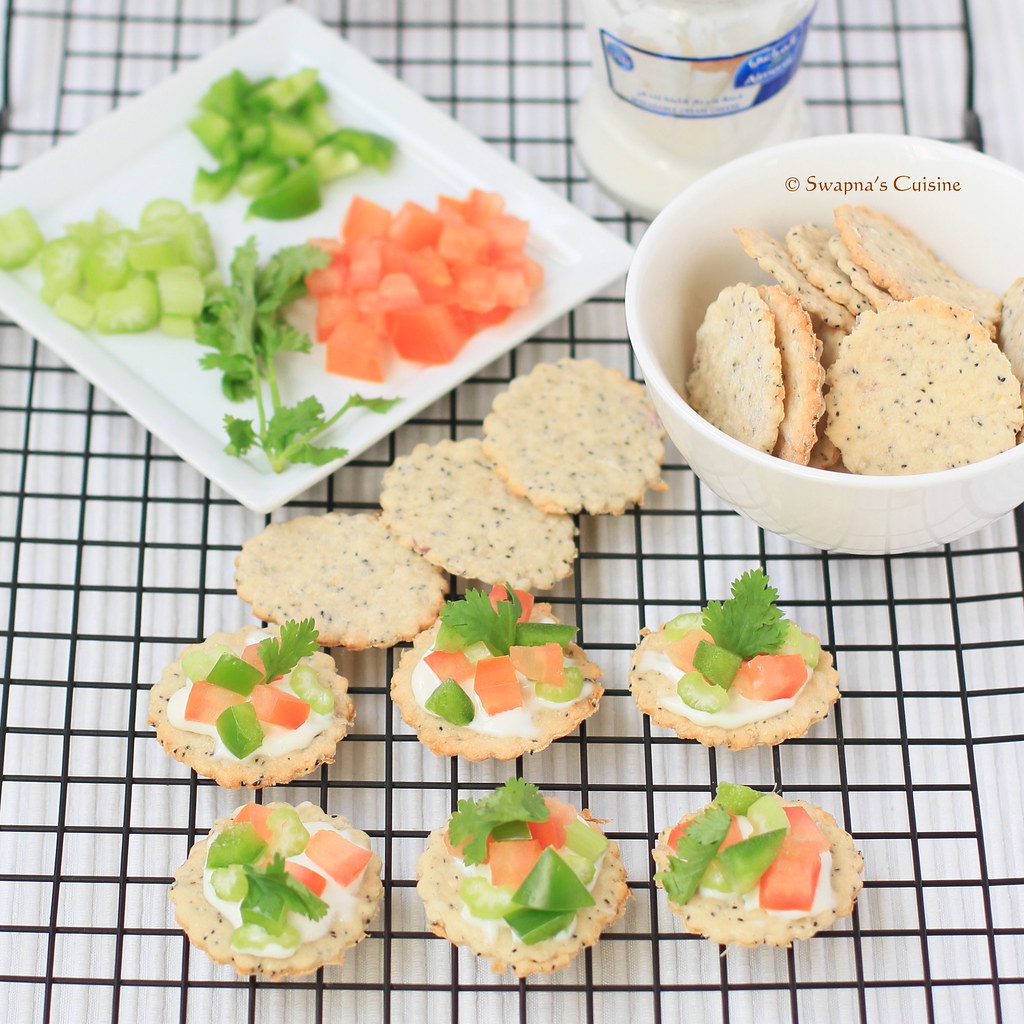
Onion and Poppy Seed Crackers ~ Daring Bakers’ challenge, February 2013


Sarah from All Our Fingersin the Pie was our February 2013 Daring Bakers’ host and she challenges us to use our creativity in making our own Crisp Flatbreads and Crackers!  
I missed the last DB challenge and I didn’t want to miss this month too… February was a very busy and hectic month for me, birthday, Church Harvest festival and 5 days of long holidays and I somehow managed to bake these crackers on time… Thanks to Sarah for making this month’s challenge so simple and easy! These onion crackers are very easy to make and are very addictive to munch on… I also served these with little cream cheese topped with some fresh vegetables and herbs… Instead of cream cheese you can mix some Mayonnaise with a dash of Sriracha sauce too… I served these crackers with wine to my guests and they all loved it!
Read More » Print Friendly and PDF

Saturday, 3 November 2012

Homemade Mango Wine Recipe / Manga Wine


Manga Wine Recipe

It’s November already and hardly 52 days left to Christmas :).... Like I asked in one of my last year’s post have you started your Christmas preparations like soaking fruits for Christmas cake or making wine etc? This year I don’t need to soak much fruits as I have some left over from last year but wine I need to check if there is enough to last till Christmas ;)....  And if in case you are looking for a nice Christmas cake or wine please check my old posts.... Now we will proceed to today’s wine recipe…. This wine was made after a phone conversation with my neighbor and cousin Saira.... during one of our chats the topic of wine making came up and we got the idea of Mango Wine..... for a week Mango wine was in my mind and I was thinking how it would taste etc..... so on my next grocery shopping I bought a kilo of ripe mangoes.....Since my Guava Wine was a huge hit I decided to follow the same recipe and after the fermentation period I gave a bottle to my cousin to taste and according to her husband this is my best trial :)..... I am waiting for next summer so that I can buy some Indian Alphonso Mangoes and try this wine one more time.... I know it’s not mango season now, but if you are a wine lover and whenever you get hold of some good quality mangoes do try this I am sure you will love it..... 
Read More » Print Friendly and PDF

Sunday, 10 June 2012

Blue Lagoon Cocktail


Blue Lagoon Cocktail

We love drinks with blue Curacao and most of the time when we dine out I end up ordering a blue Curacao drink..... So recently when I found Curacao syrup I grabbed a bottle and made this simple cocktail..... all the measurements are eyeballed so adjust according to your personal taste.... I used white rum for the cocktail version and I think vodka might be a better option for cocktails.....  I also tried this with soda and sprite and both are nice.... For a mocktail version just omit alcohol.... Now the temperature has touched almost 50°C it was really refreshing on a lazy weekend evening..... And of course as I have more than half the bottle of syrup left you may soon find a lot of similar cocktails / mocktails with different combinations out here and also if you have any nice cocktail recipes please do share with me :)......
Read More » Print Friendly and PDF
Related Posts Plugin for WordPress, Blogger...